Keymesh
- Complete rewrite and revival of iconic Keymesh add-on by Pablo Dobarro, one of the creators of modern sculpt mode. Add-on also includes updates from Aldrin Mathew. Original testing and images/videos by Daniel Martinez Lara
With Keymesh, you can create stop-motion-like animations inside Blender in a very traditional way. Keymesh makes it possible to swap object data between frames for almost every type of object. That means you can sculpt, model, groom, or paint frame-by-frame to craft beautiful (additive, destructive) animations!
This version of Keymesh has been updated to work on all types of objects so that you can animate flowing hair curves, floating volumes, text changing between frames, or vesimes (mouth-shapes, replacement parts) from curves so that you can animate stop-motion style lip-syncs in a matter of seconds! This implementation also intends to make Keymesh usable in a production environment, both for 3D and actual stop-motion studios.
Features of the add-on include:
- Frame Picker
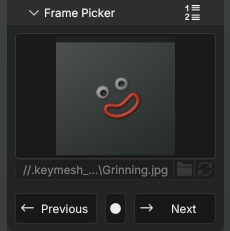
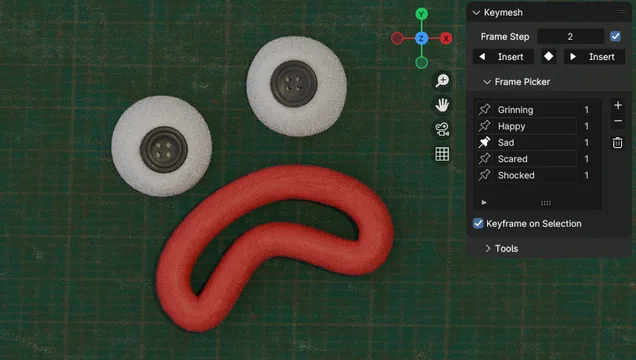
Keymesh has a Frame Picker UI that lists all versions (blocks) of objects you've made with Keymesh, lets you organize them and insert new keyframes for them easily, without having to duplicate keyframes in Dope Sheet. UI also displays how many times each block is used in the animation.
(Keymesh can also work as an object versioning add-on, so it is useful for modelers and sculptors too. Internally it works by saving multiple versions of the object data (e.g. Mesh, Curve), meaning you can save, for example, different layers of your sculpting, and different variants of the model you can't decide between. And you can put them on the timeline, scrub, and see all versions of your object in succession!)
- Append, Link, and Library Overrides!
Keymesh objects can be appended or linked in your scene files. On linked objects all operators except previewing are disabled, but you can make library override, assign it a new local action, and create new animations by placing existing blocks in the timeline. You can't change Keymesh blocks, or create new ones in the scene file, but in the original file you can, and when you refresh your scene file new blocks will be available for linked & overridden objects in Frame Picker, ready to be animated!
This allows you to have “replacement parts workflow”, in which you create all the frames/blocks you’re gonna need beforehand in the object file, and in your scene file you arrange those blocks to animate switching between them. Exactly how the replacement parts method works in real stop-motion productions.
(IMPORTANT: Don't forget to disable "Instance Object Data" option in File Browser when you're appending or linking Keymesh object)
- Render Farm Support
You can bake your Keymesh animation so that it can be sent to the render farm where Keymesh isn't installed. For every Keymesh block, "Convert to Separate Objects" operator (set to Rendering workflow) creates a new object and animates its visibility, so in the end animation looks exactly the same, but instead of Keymesh blocks it shows separate objects. Operator isn't destructive, so you can just delete the collection and run the operator again when you make changes to your animation.
- 3D Printing Replacement Parts
Operator that turns Keymesh animation into separate objects. A new object will be created for each animated frame and lined up in your scene, ready to be exported and printed. This tool is for people who want to use Keymesh for real-life stop-motion productions by 3D printing animated parts for each frame and using them as replacement parts. Operator can also delete duplicates, so that you never print same thing twice.
(See this Blender Conference presentation about how this feature is used in stop-motion production)
- Shape Keys to Keymesh
Destructive operator that lets you convert shape key animations into Keymesh. Shape keys are removed and instead sculpted animation is baked into Keymesh frames. That means you can combine 3D animation workflow with traditional stop-motion, by doing "Keymesh passes" after you're done with shape keys, and want sculpt details on individual frames.
- And many more on the way!
-- PageUp and PageDown (with and without Ctrl) are default shortcuts for inserting new keyframes and jumping in timeline. -- You can customize your UI and workflow by changing preferences and even enable experimental features if you're feeling risky.
This version of the add-on is being developed for a stop-motion animation studio and will receive future updates with new features and improvements. If you want to help out, suggest new features, or report bugs you can reach out at Blender Artists or Github links provided.
We encourage you to share the work that you make with Keymesh with us! You can help by spreading information about the add-on. If you want to make a video tutorial using/about Keymesh you can do so without having to ask, but feel free to contact if you need any help.
What's New
2.3.0 December 21st, 2024
Keymesh 2.3 is out! It's a major release mainly aimed at supporting new workflows not possible before.
THUMBNAILS & GRID VIEW
- Frame Picker gets a new UI mode: grid view, where Keymesh blocks can now be visualized with image thumbnails.
- Operator for generating thumbnails with viewport render.

BAKE TO KEYMESH
- New tool for baking regular animations as Keymesh blocks. The operator will create a new Keymesh block for each frame and apply (selected) modifiers and shape keys.
- Can bake down only on specified frame range and animate modifier visibility before and after Keymesh animation to enable smooth
Armature -> Keymesh -> Armatureanimation workflows.
STATIC KEYMESH
- Keymesh can now be used simply as a mesh versioning tool: it allows saving multiple versions of the mesh in the same object without animating them, and switching between them with a click!
- Static Keymesh objects benefit from all the tools of the add-on (frame picker UI, thumbnails, converting to individual objects, etc.) all of which were fine-tuned specifically for this case.
- "Convert to Separate Objects" operator gains a new "Explode" mode, which simply turns each Keymesh block into an individual object.
JOIN & EXTRACT
- New "Join as Keymesh" operator, which allows combining multiple objects into one Keymesh object (including multiple Keymesh objects). Works as Blenders "Join" operator, but makes object data of each selected object a new Keymesh block for active one.
- New "Extract Keymesh Block" operator that allows removing ("popping") individual blocks from Keymesh object and making them separate objects. Combined with the Join operator it allows users to extract blocks, work on them individually (including in other softwares), and put them back in Keymesh again.
UI/UX
- "Keyframe on Selection" was removed. Instead, now simply selecting a block in the list (or grid) assigns it to the object. No need to switch between selection and keyframing modes!
- Pin icons were changed by circles and icon state meanings were simplified.
- New filter menu in "Frame Picker" that allows hiding operator button (useful for static objects), and usage count (useful for improving performance).
- New "Keymesh" panel in scene properties where users can completely disable Keymesh animations for performance or testing reasons.
... and much more. Read full release notes at: https://github.com/nickberckley/keymesh/discussions/34
It works fine but I really really wish there was a way to blend / smooth between frames and not just be 100% this or that frame.
This is honestly no different to setting up a macro to create new shape key @ 100% and set it as key'd when you click off it or make new keyshape.
It also destroys all existing keyshapes which is not good at all if you just wanted to use it for a single part of your model. especially if that single part is the face.
It works but only technically as advertised. Which if that's what you want and nothing else, have fun!


Is perfect