 Substance Textures Importer
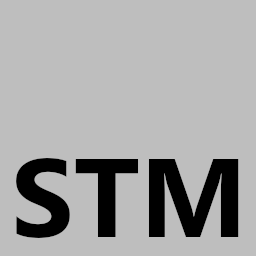
Import images textures made with Substance Painter or other similar surfacing tools into Blender 3D easily. The script looks at all the images in the chosen directory and attempts to guess the corresponding shader input to plug them into. According to the target materials names, the algorithm will look for a matching image name pattern to fill the selected map names enabled in the UI panel.
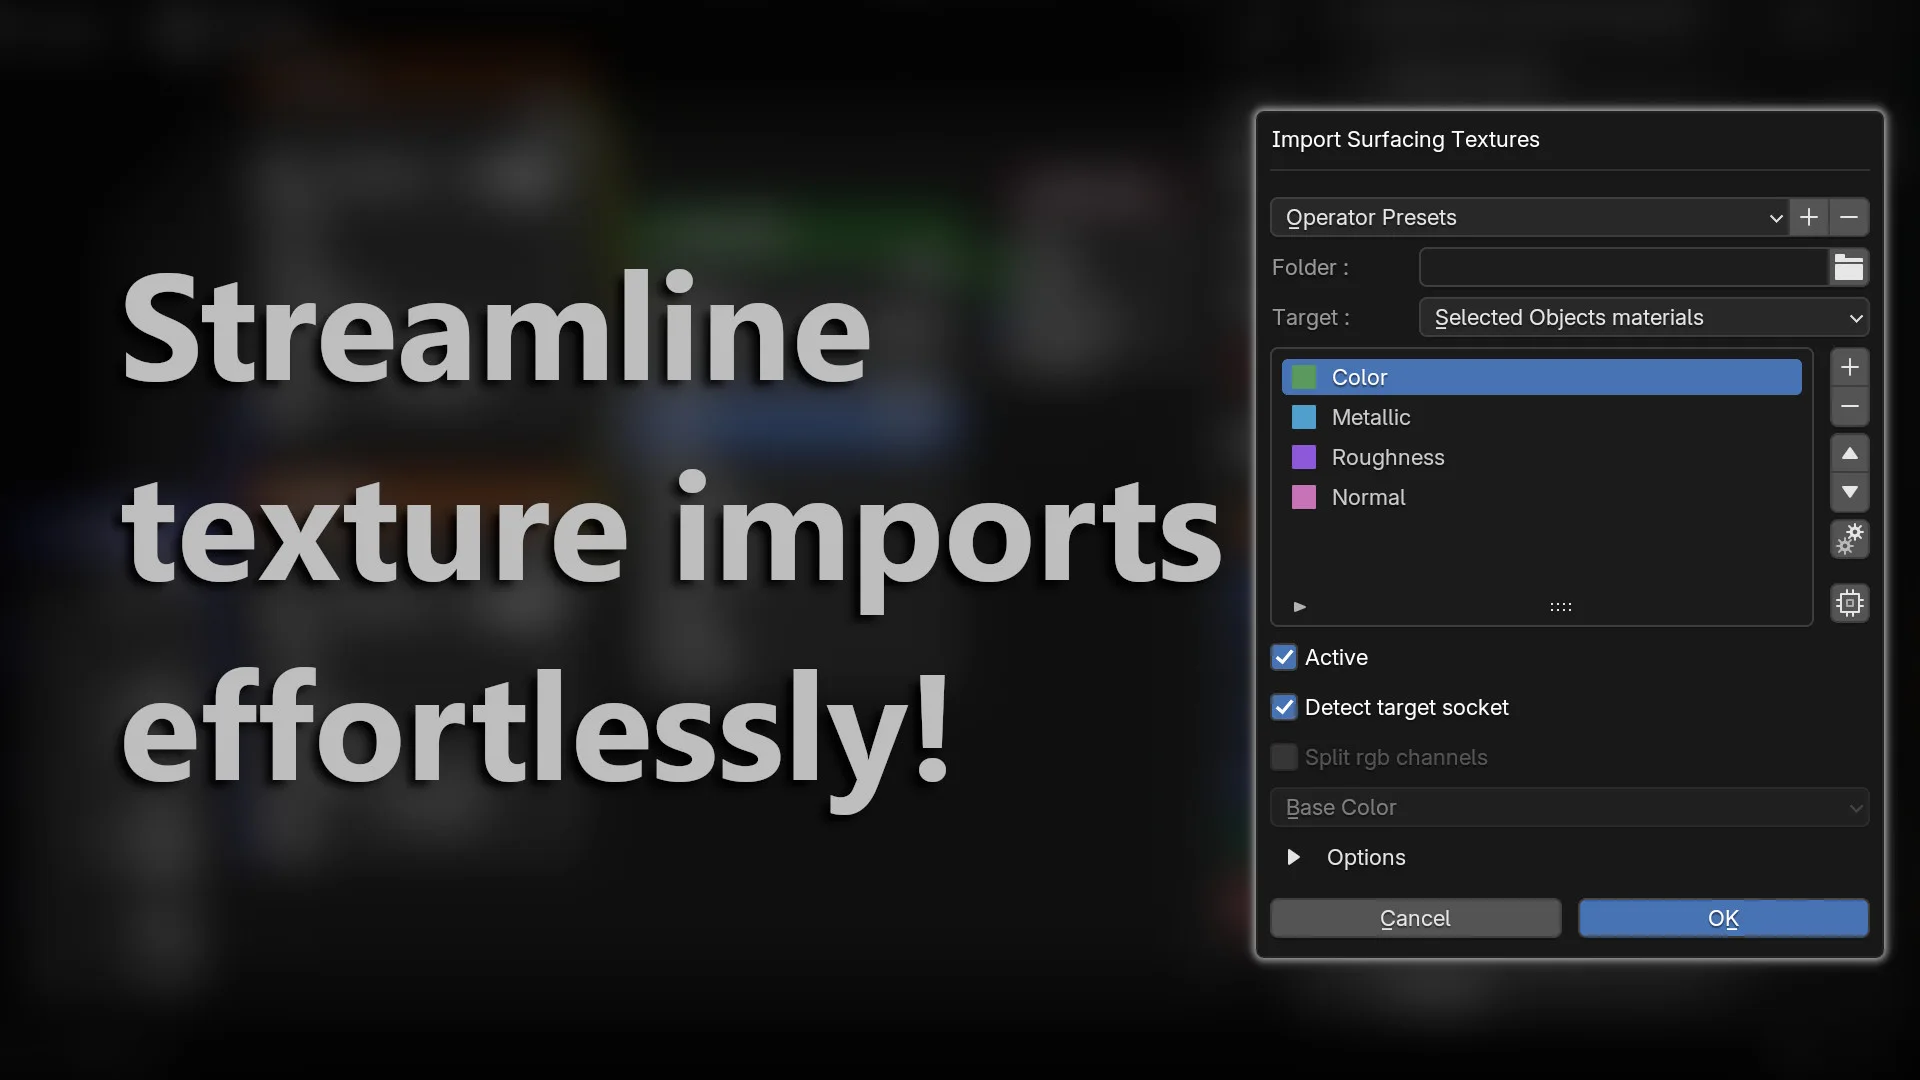
The extension panel is available via a shortcut button in the File menu > Import > Substance textures and in the Shader Nodes Editor SideBar > STM Tab (optional). Also, an option is available in the extension preferences to have a shortcut button displayed in the Material properties as well. The texture maps names are editable and can include up to 3 multi-channel maps. The target shader input socket can be set from a drop-down list for better control.
Portable panel displayed when using the shortcut in Nodes editor or the optional Material properties:
The texture files must have been exported using a pattern containing the material name and a map type (BaseColor, Metallic, Roughness, Normal etc.).
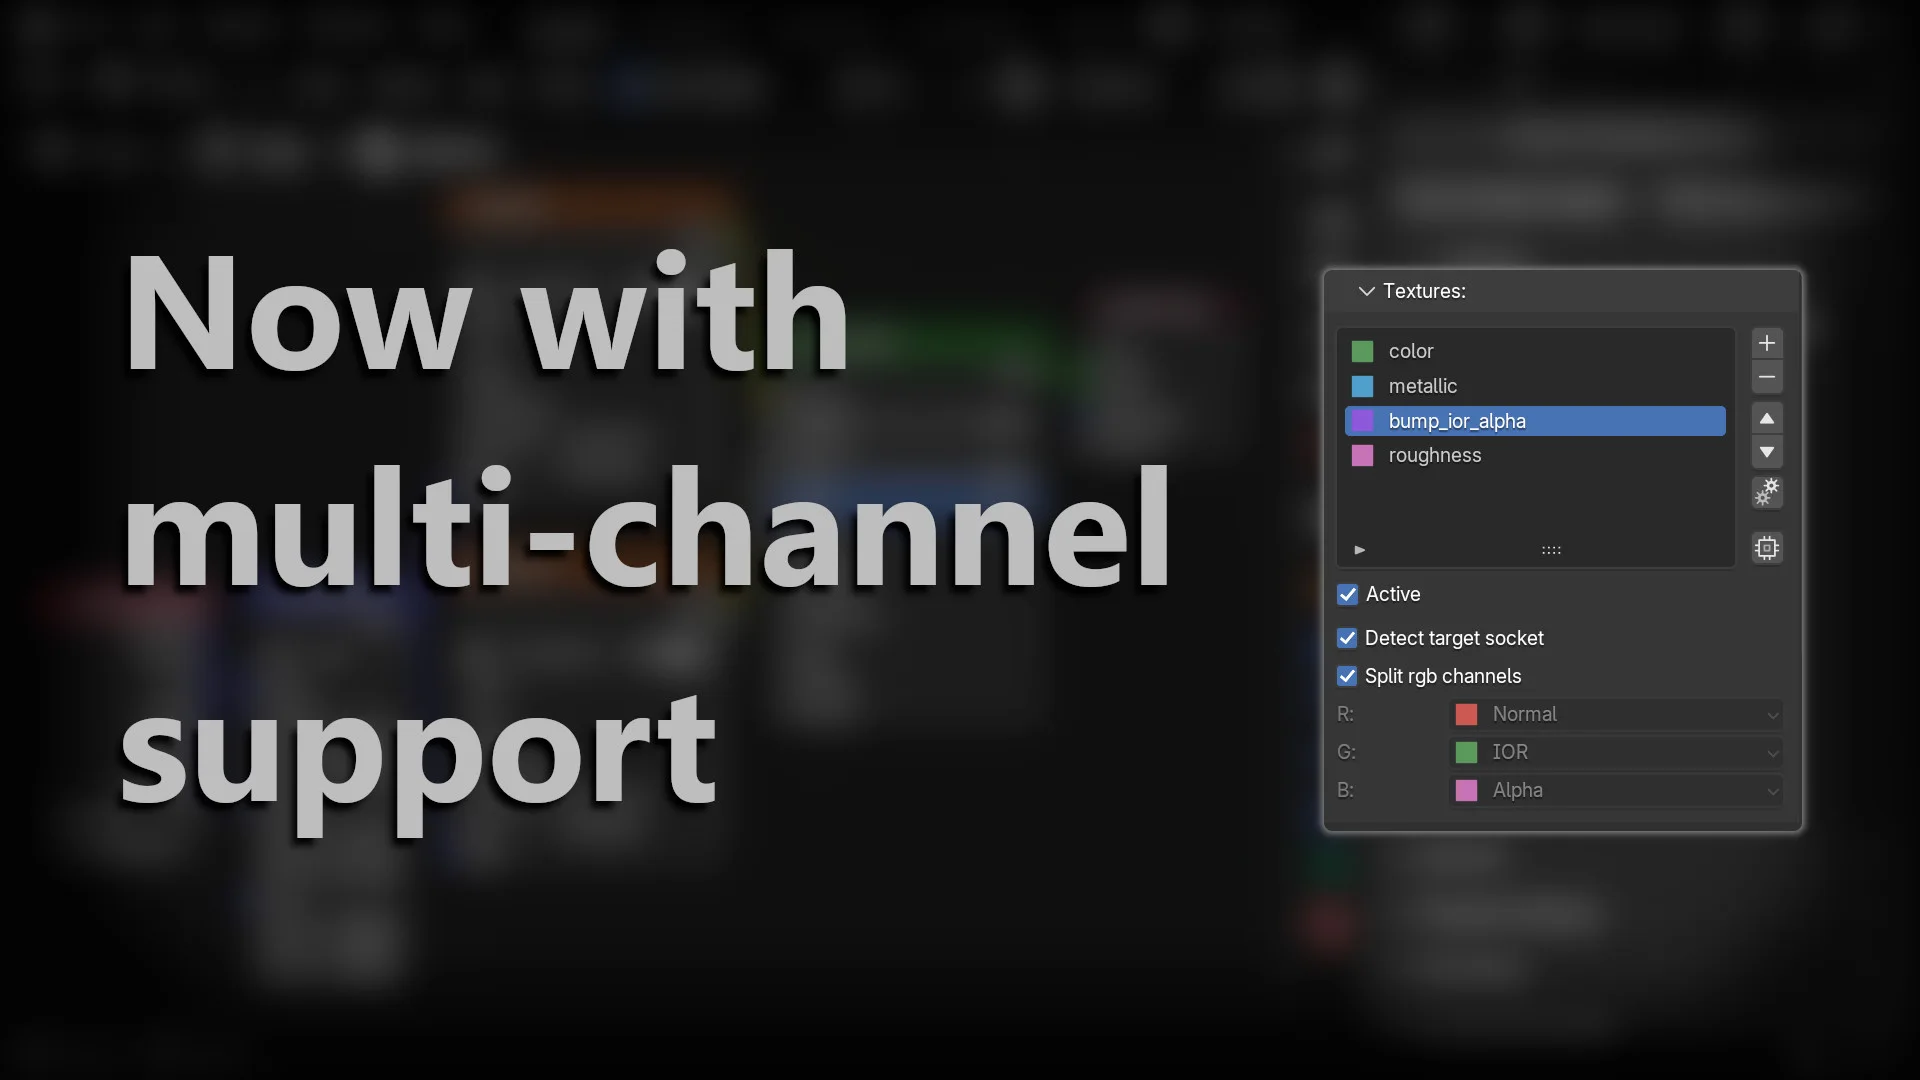
You can use the Split RGB option to connect the Red, Green and Blue channels individually if your textures include separate maps mixed in. When 'Detect target socket' is enabled the script will parse the line name and fill in the input socket if a match is found and Line names like 'alpha_ior_metal' will be recognized as split-rgb.
Note: 'Detect target socket' should be disabled to be able to manually select a target socket for a texture map or the drop-down list will overwritten and appear grayed out.
Various options are available for fine tuning such as adding RGB curves and color ramps, using custom shader nodes, inverting the Green channel of the normal map or even ignoring the .00x prefix in duplicated material names. Manual assignment is also possible for a given material regardless of the texture file name pattern.
The panel labeled "Substance Textures Importer" is available via a button in the File > Import menu or the side bar of the Nodes editor (STM tab) and can have a button displayed in the Material Tab if you set it in the addon preferences. This will open a panel with a default list of textures names. First set the desired target in the 'Target' dropdown list at the top and choose the directory containing the textures files to be imported using the folder selection window or the field under the "Maps Folder" section of the Shader Node Editor Panel. After setting the folder, modify the texture maps names ('Color','Roughness'...) to fit your naming pattern, or use the '2-gears' button at the right of the list to attempt to auto-fill the line names if the current material name is detected in the folder content. The button with the chip icon below restores the line names to a default set of values.
You can enable/disable the textures maps type you wish to import by ticking the 'Active' checkmark under the maps list in the extension panel (you can also add/delete more lines and edit the texture map name if needed)
By default the script will import the images for all selected objects at once, the target can also be set to every scene materials, all visible objects materials, only the active object or only the active material of each selected object.
The separator character used to identify multi-sockets lines is configurable in the extension preferences panel ( separators currently available: _ - , ; . + & ).
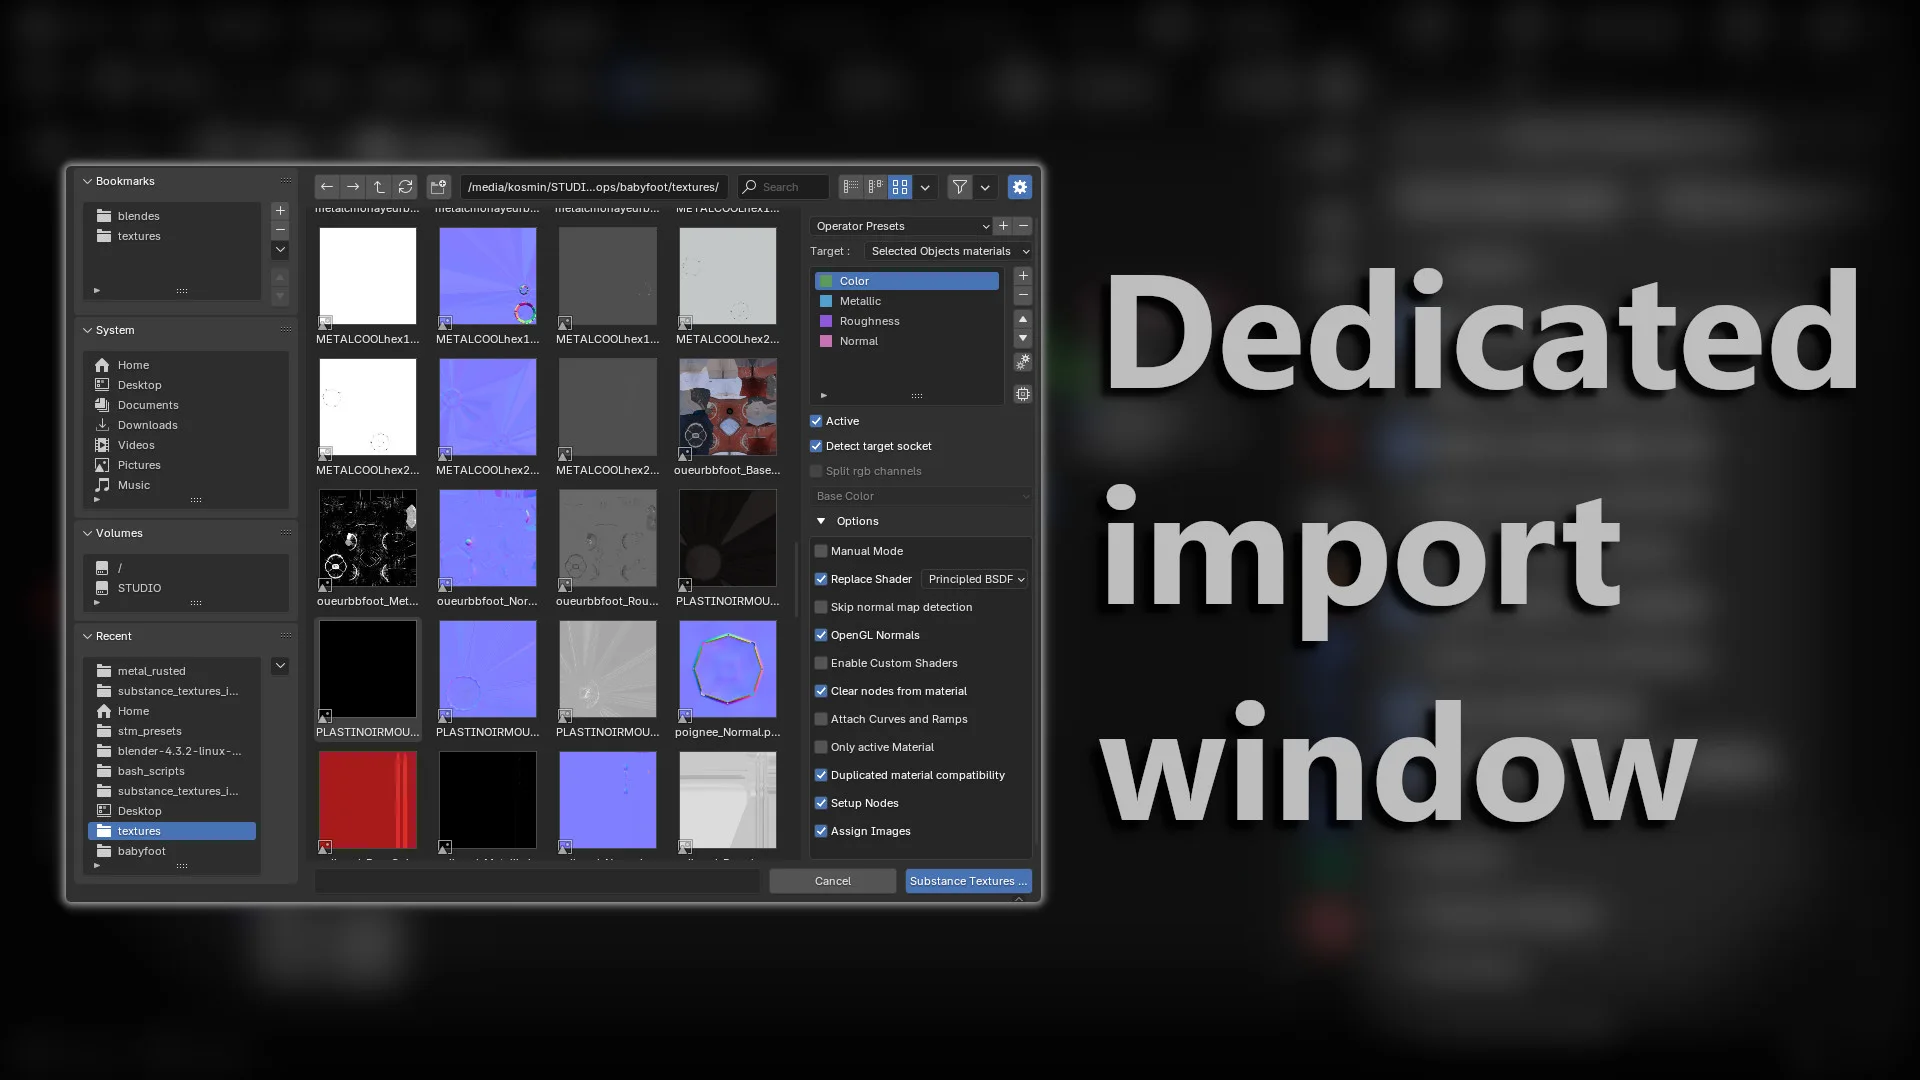
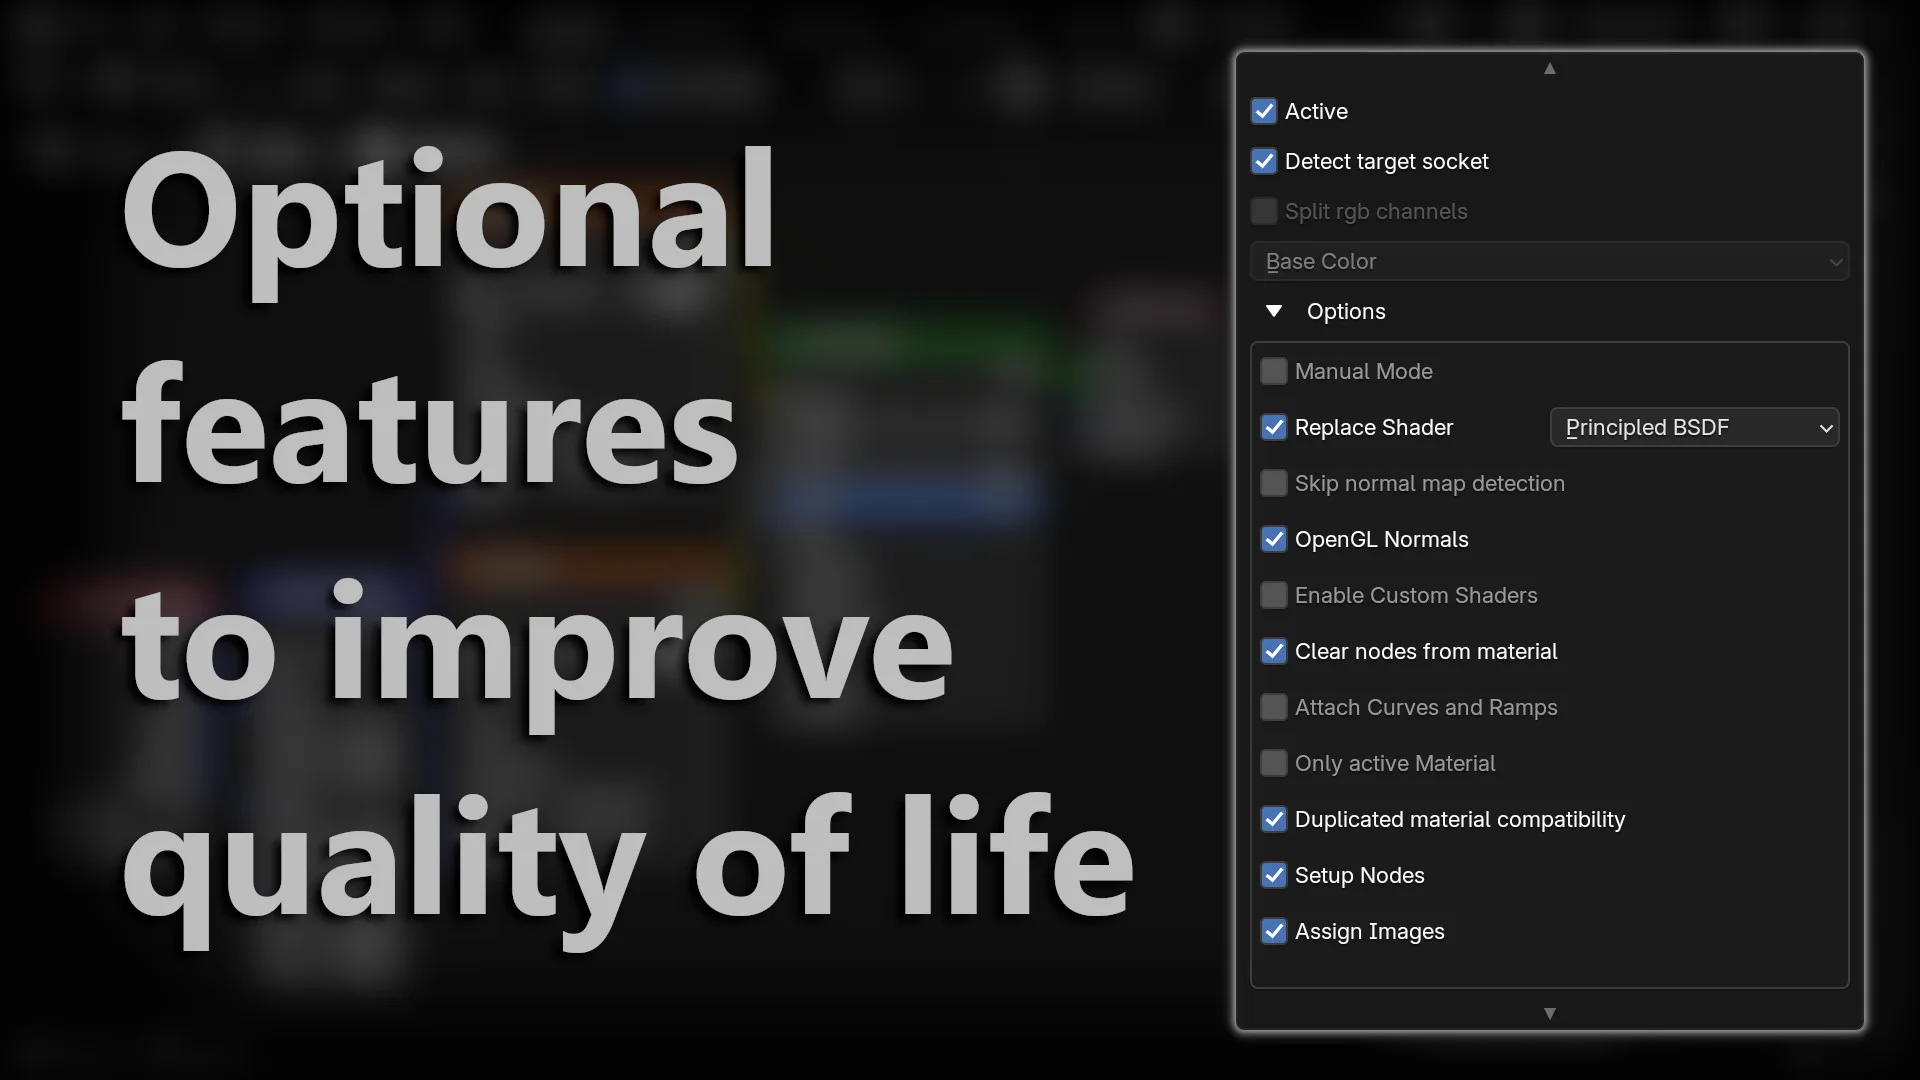
Options:
Replace Shader:
When this option is enabled the shader node of the material will be replaced by the one displayed in the dropdown selector next to it.
Skip normal map detection:
By default a normal map node or bump map node is added when a normal map or height map is detected. Enable this option if you are using a custom shader that already include such conversion node in order to plug the image directly in the selected input socket.
OpenGL Normals:
Enabled by default, disable it to invert the green channel of a normal map to use directx-style format instead of the usual one.
Enable Custom Shaders:
Use this option to add your own NodeGroups to the Shaders list used by the "Replace Shaders" option. Your custom shaders needs to have at least one input socket and a shader output socket in order to be added to the list.
Clear nodes from material:
Removes all existing nodes nodes from the target materials before processing them.
Attach Curves and Ramps:
Inserts a RGBCurve or a ColorRamp node between the images and their assigned sockets to enable fine tuning.
Only active material:
Process only the active material from the material slots for each target object.
Duplicated material compatibility:
Enable this option to ignore the .00x prefix from the target materials names.
Setup Nodes:
Required to create the nodetree connecting the images to their respective sockets.
Assign Images:
This option should be enabled if you want to load the textures images in their respective nodes.
Manual Mode:
Use this to be able to manually select a texture file instead of relying on the pattern detection algorithm of the addon. When enabled, a new line labelled 'Overwrite file name' will appear under the maps table. It can be activated for the required line and a file selection field will appear below that you can use to set the path of a texture file to import. Note: When "Manual" and "Overwrite file name" are enabled in one of the Panel lines, the addon will skip the name pattern detection and will use the path you select instead.
Presets:
The 'Operator Presets' drop-down list at the top of the panel allows you to store and loads the parameters used in the UI panel.
What's New
7.0.0 February 26th, 2025
Refactored and optimized.