- bloody_albatross changed review status to Awaiting Review
- 1 w
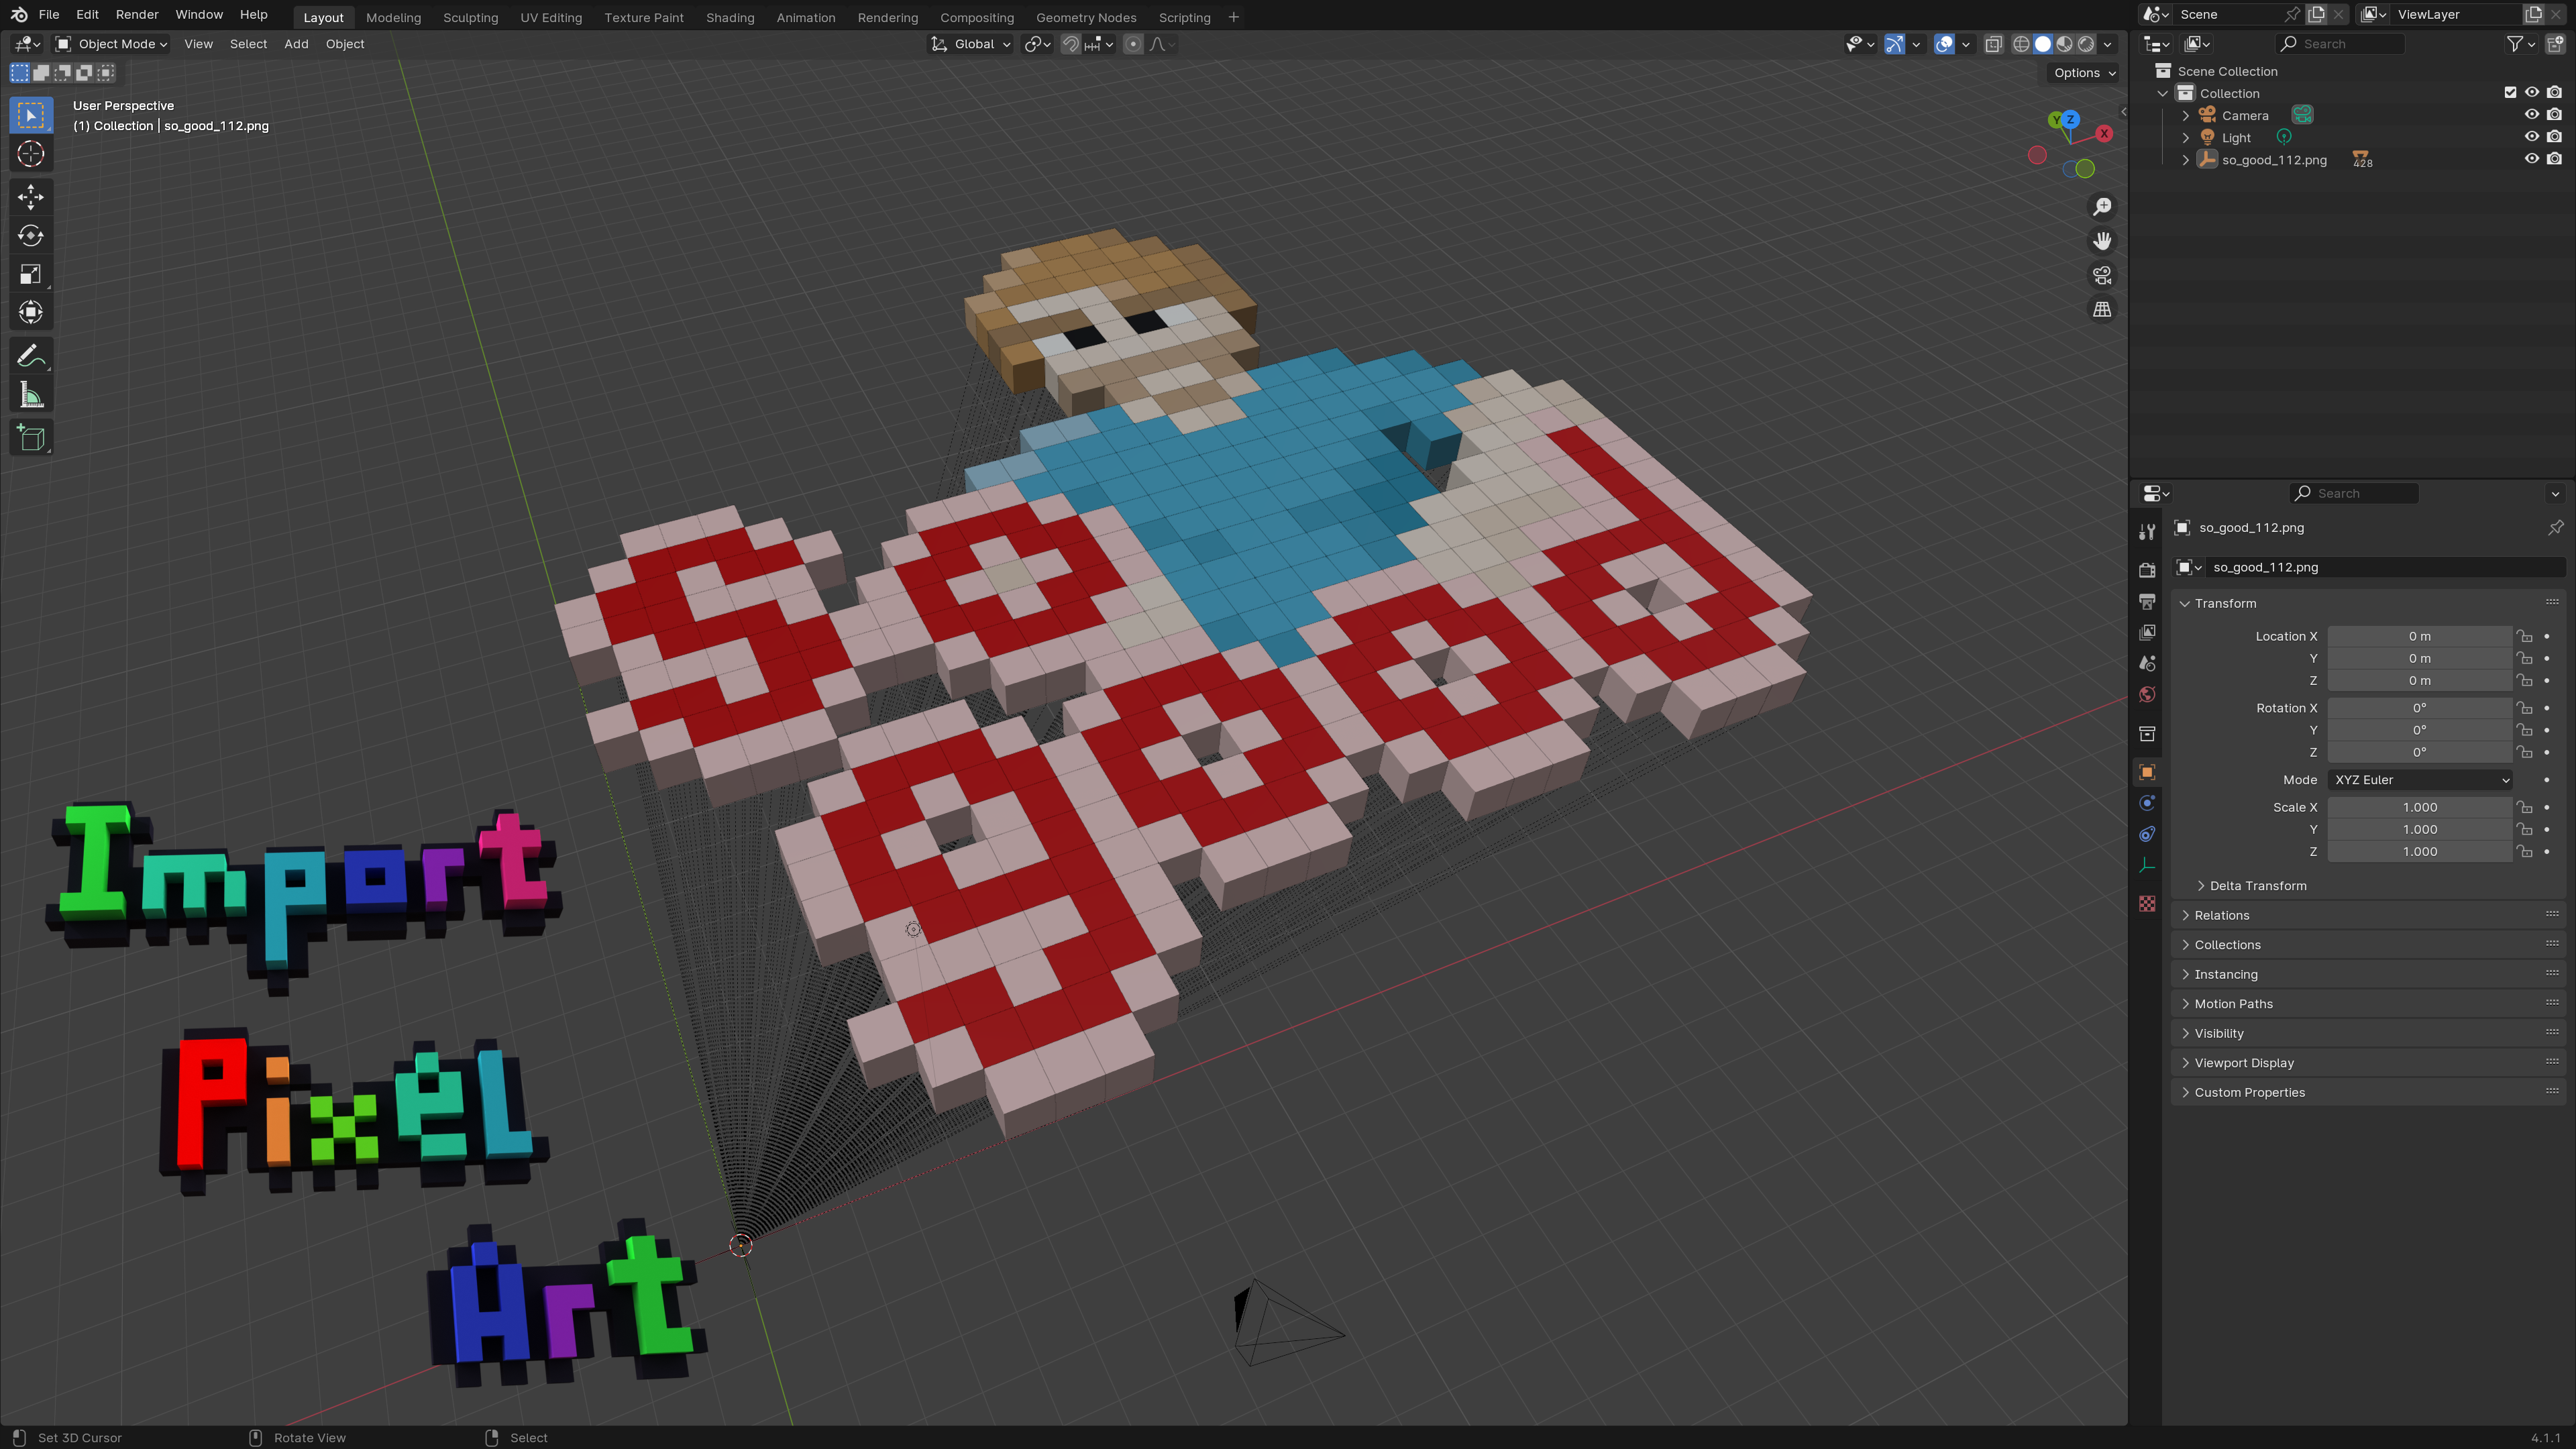
 Import Pixel Art
Imports pixel art as colored cubes or squares for each pixel.
Featured image
This add-on imports pixel art images as colored cubes or squares. Pixels with 100% alpha are ignored.
NOTE: For best results the imported pixel art should actually have the apparent pixels be actual 1x1 pixels in the image. If not, there is an option to automatically down-scale such images, but it will not work for lossy images (JPEG) or if it was scaled to a non integer multiple of the original size and might be slow (see below for more details). Maybe you'd rather want to down-scale the image manually (using nearest neighbor option) in an image editor.
Features
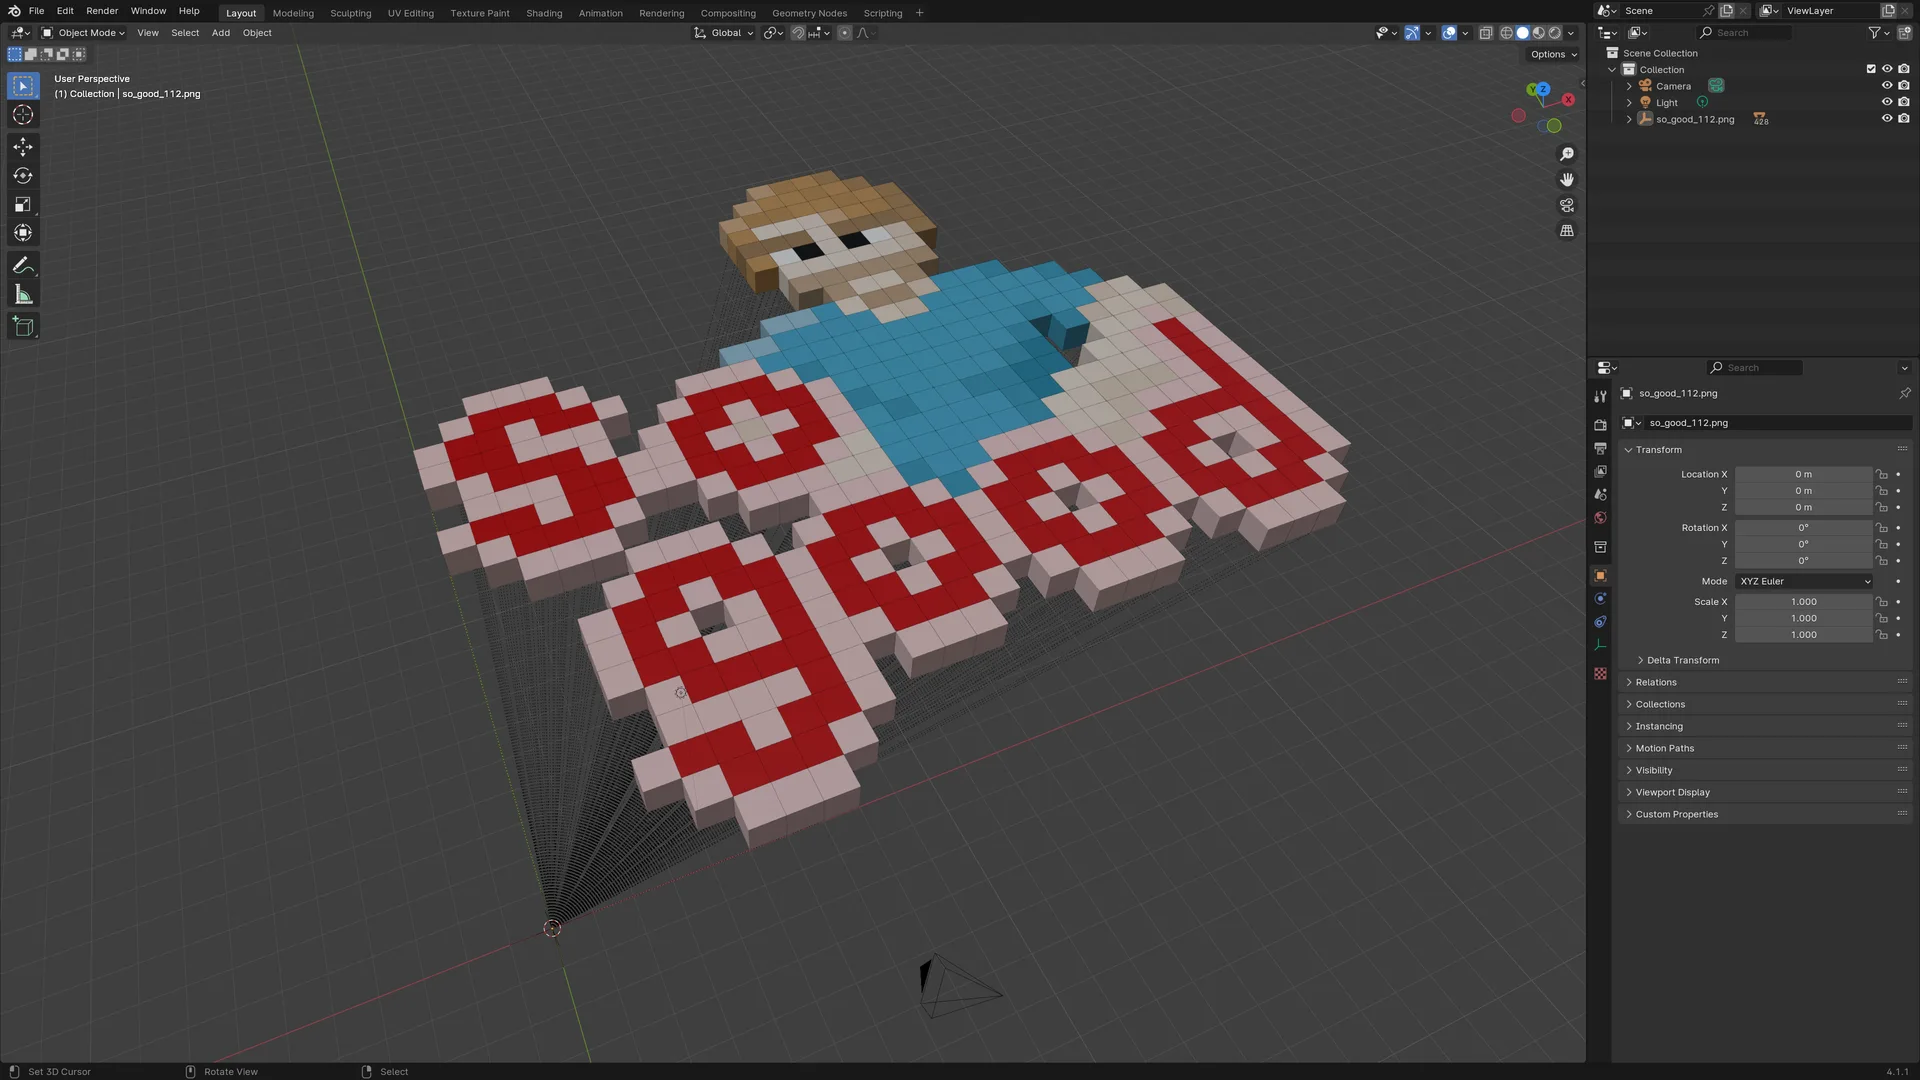
This add-on imports pixel art images as colored 1x1x1 separate cubes or 1x1 planes in a single mesh. Pixels with 100% alpha are ignored. All pixels of the same color will share one material. The material can use nodes. The names of the created cubes and materials can be controlled through format strings.

If you use the option 'Separate Cubes' then the imported pixels are all parented to an empty object so they can be easily transformed as a whole. The cubes have a size of 1x1x1 so they can be easily moved around pixel-by-pixel while holding ctrl.

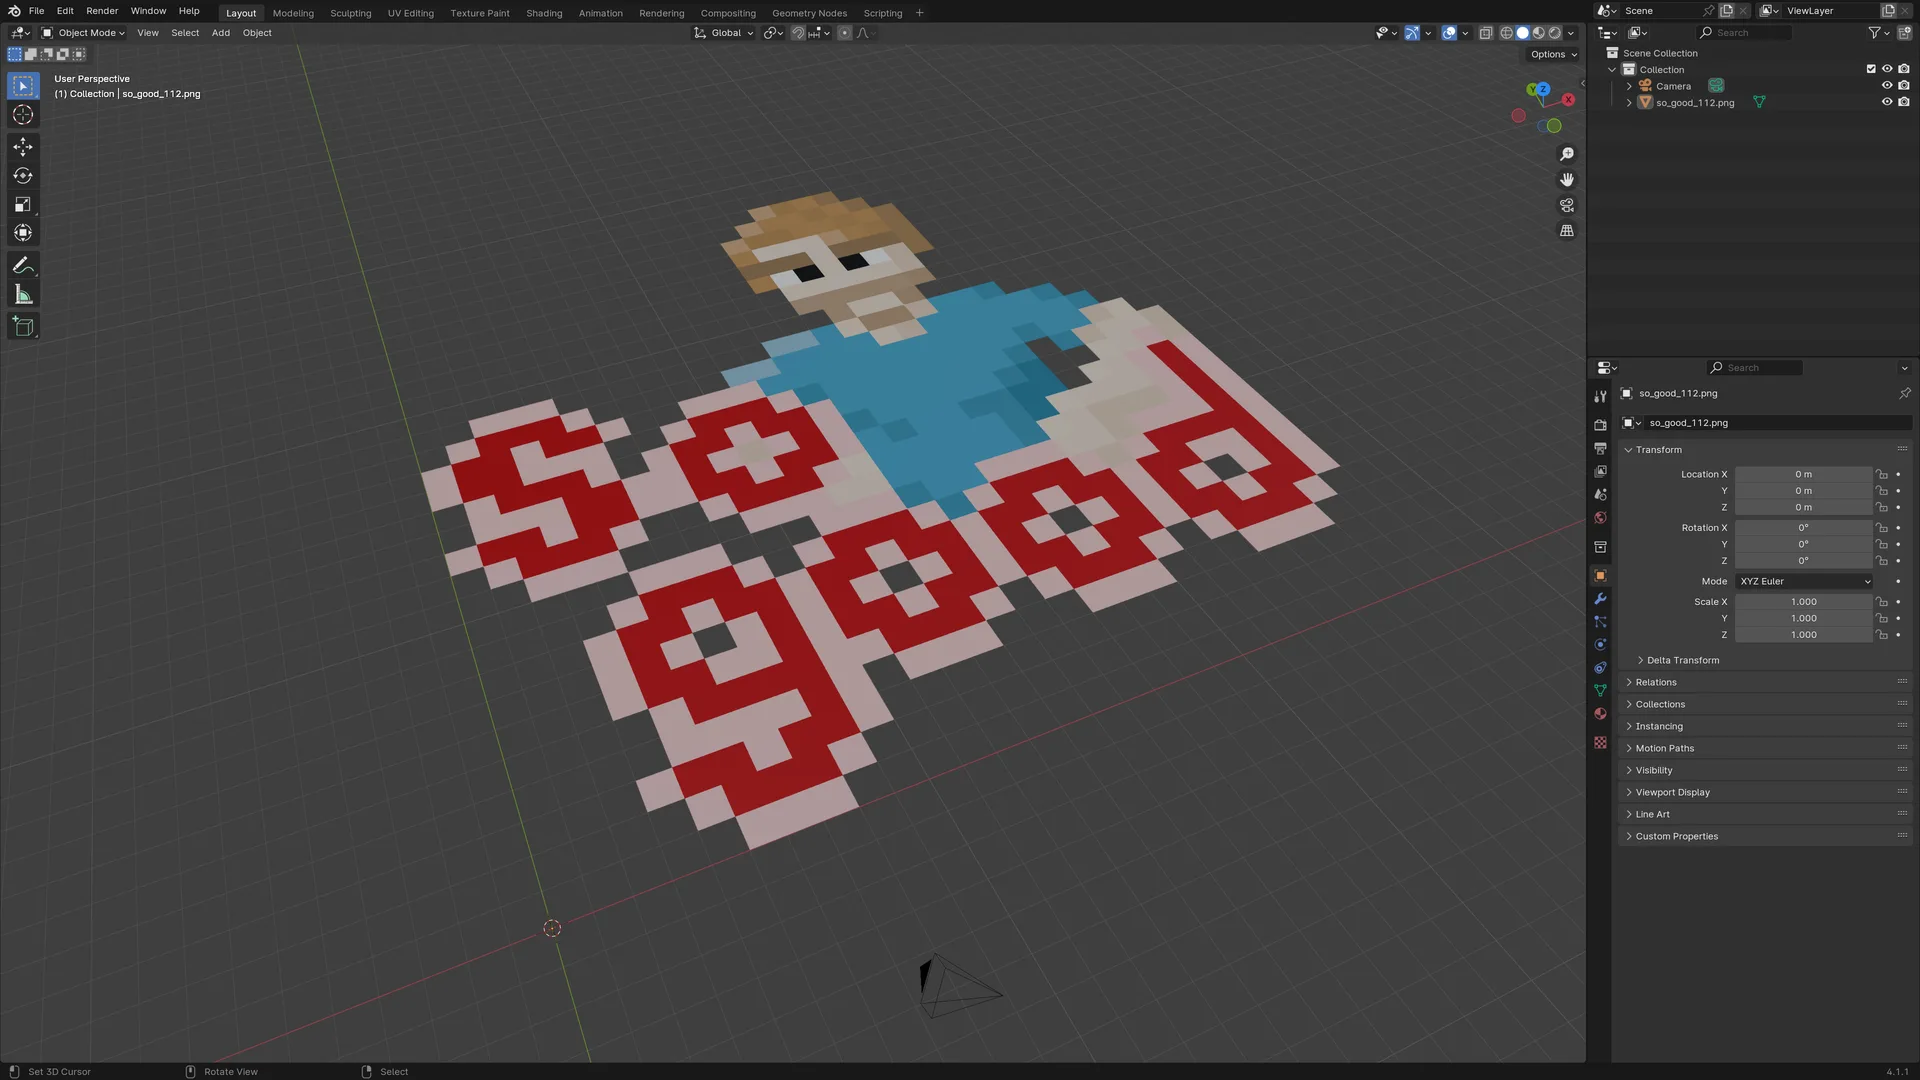
If you use the option '2D Mesh' all the pixels will be planes in one single mesh. If you still want cubes then simply extrude the whole mesh by 1 unit in the Z direction. Alternatively you simply can use the solidify modifier.
This option imports much faster and it seems it is also faster to work with a single large mesh in blender than to work with many small objects.

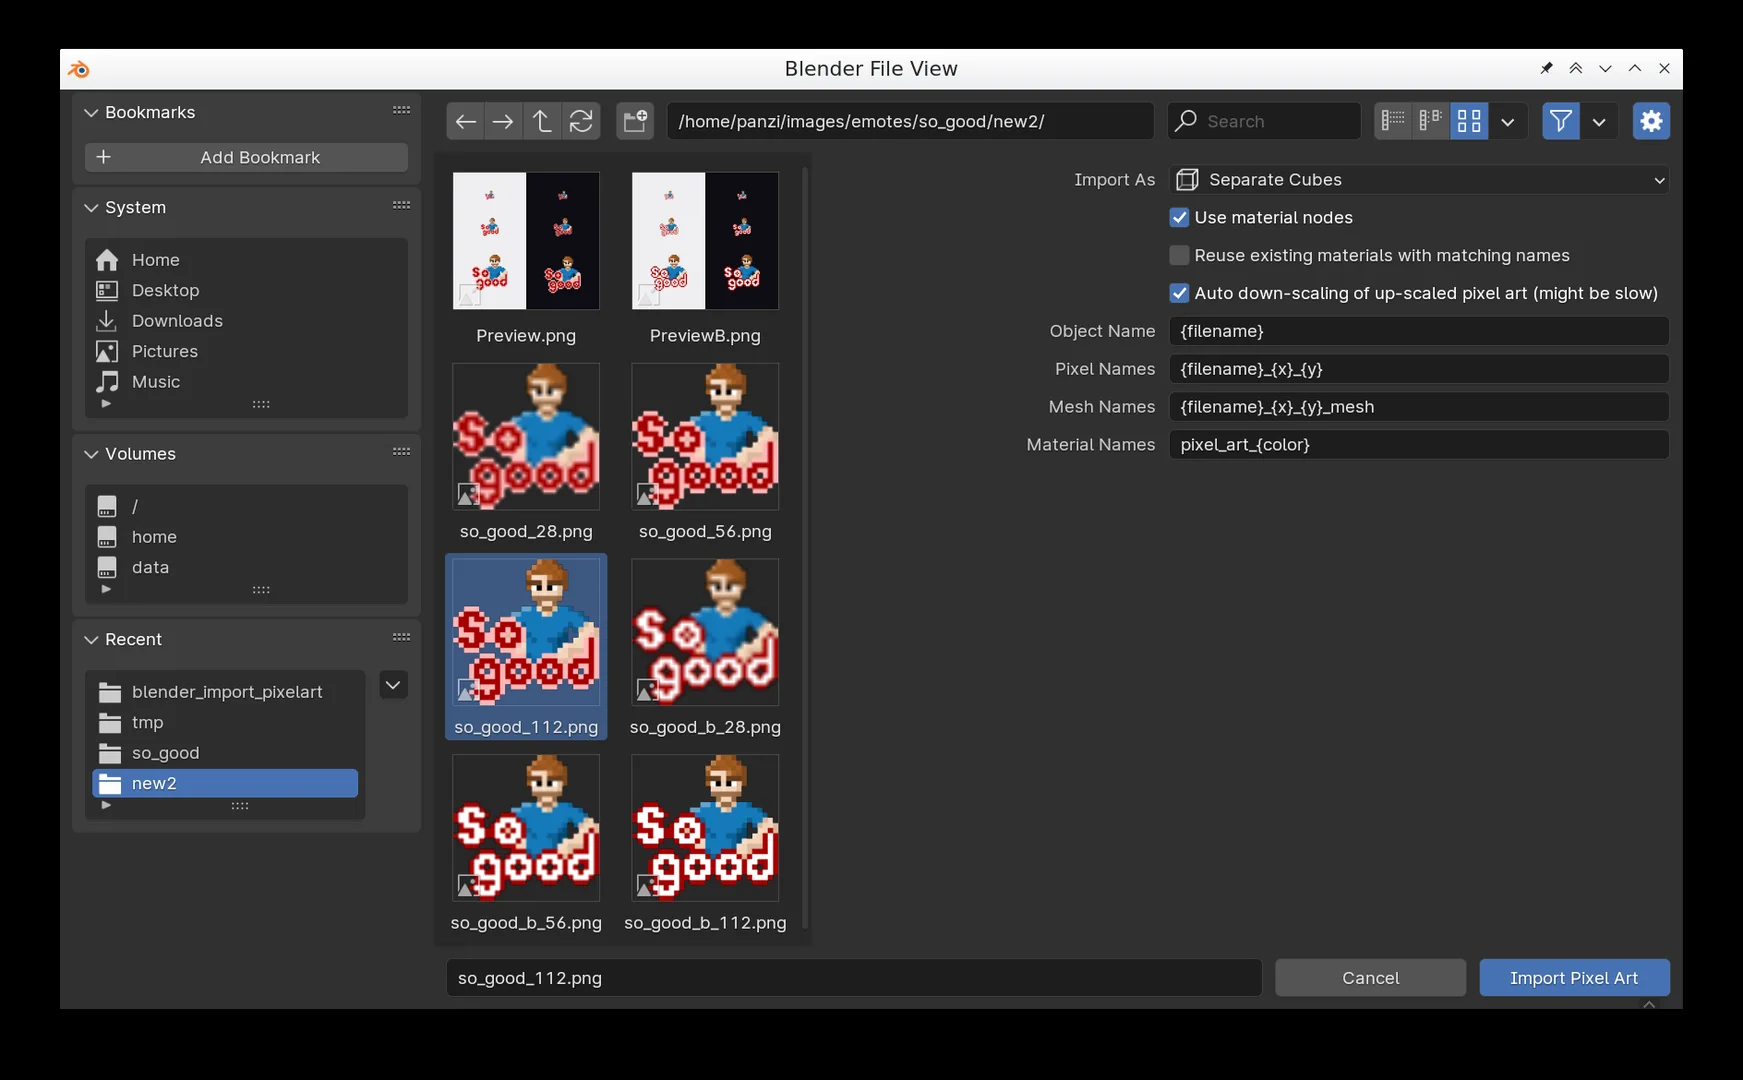
Options
Import As
- Separate Cubes: Separate cubes where each cube is its own object.
- 2D Mesh: A single mesh that contains all pixels as squares.
Use material nodes
When this option is checked the materials of the pixels will use nodes.
Reuse existing materials with matching names
When this option is checked already existing materials that match the specified name will be used instead of creating new ones.
Auto down-scaling of up-scaled pixel art
Often pixel art is posted on the internet in an upscaled form, meaning one apparent pixel is actually e.g. 8x8 or more pixels in the image. When this option is checked the image is analyzed and automatically down-scaled. This might be pretty slow for big images, since this is all done in Python.
NOTE: This only works if the image was up-scaled to an exact integer multiple of the original and no other filters where applied. If the image was saved as a lossy format like JPEG this will fail pretty much always, since lossy formats kinda smudge the pixels. The used image should best be PNG, BMP, or GIF.
The algorithm is quite primitive, but works for many pixel art images.
Object Name
Pattern for the name of the empty object that will be the parent of all the pixels. This object is helpful when you want to transform the whole pixel art at once. You can safely delete it if you don't want it.
Pattern variables: {filename}, {use_nodes}
Pixel Names
Pattern for the names of the pixel objects.
Pattern variables: {filename}, {use_nodes}, {color}, {x}, {y}
Mesh Names
Pattern of the names of the meshes of the pixels.
Pattern variables: {filename}, {use_nodes}, {color}, {x}, {y}
Material Names
Pattern of the names of the materials of the pixels. Note that pixels of the same color will also share the same material. This way you can easily change the material properties of all pixels of the same color.
Pattern variables: {filename}, {use_nodes}, {color}, {x}, {y}
Patterns
In name patterns certain variables will be replaced with their respective
values. Because these variables use a {name}-syntax if you want to include
curly braces in your names you need to escape them as {{ and }}.
{filename}– The name of the file (not including the folder names).{use_nodes}– The stringnodesif the use material nodes option is selected, an empty string otherwise.{color}– Hexa-decimal string of the color of the pixel (RRGGBBAA).{x}– X-coordinate of the pixel.{y}– Y-coordinate of the pixel.
What's New
1.2.1 September 14th, 2024
Added warning text in import dialog about too big image sizes.
Activity
-
-
- nickberckley changed review status to Awaiting Changes
- 6 d
Very cool feature. But performance isn't too good. Even on 256x256 image it takes a while to load in. If you can't improve performance of the code (I would advise you to take a shot at it tbh), it would be good to check the number of pixels before the operator starts, and prompt users with something like: "This is trying to load in more than 100,000 pixels, it's gonna take a while, are you sure?" so that users know and expect slowdown. This will help you too reduce number of bug reports.
Besides that, link in description about downscaling images is broken
-
The planes option is much much faster than the cubes option. I don't know why it's so slow to add cubes. Maybe because they're all separate objects? Is there a faster way to batch-add objects? The relevant code is here: https://github.com/panzi/blender-addon-import-pixelart/blob/ad4283076786903fb0ed18383540d57eb8279971/io_import_pixelart.py#L263-L338 Am I doing something obviously wrong? Is a wrong order of the operations perhaps causing the slow speed?
-
Also: How do I open a confirm dialog? I can only find how to run another operator after a confirm dialog, but not how to ask in the middle of an operation for confirmation.
-
Also I now tried to do this as an experiment: Import pixel art as a 2D mesh (fast), extrude all squares into cubs (fast), separate by loose parts (very very slow). I guess creating new meshes/objects is really slow, no matter how you do it. I.e. the only option would be showing the confirm dialog when opening a large enough image, but I can't find a way to do that from within execute(). After all, I need to know the selected options and read the file to determine whether to show the confirmation dialog.
-
Confirmation dialog is indeed difficult for the importers. In the meantime I would advise putting a label with Info icon in the sidebar of file browser alongside properties with the warning text.
It should indeed be much faster to create a plane, extrude it, and separate.
bpy.opssubmodule is usually very complex, high level, and therefore slow. It's always recommended to avoid using it and instead use low-level API, like mentioned above. Usingbmeshmodule for extrusion should be fast as well. -
I've added a warning text about this. But since Blender doesn't seem to support a multi-line label I'm doing line wrapping myself in a hacky way. (Is there a way to display multiline text?) I use a high DPI monitor, so I don't know if I do it right for monitors with other DPIs. I scale
context.region.widthlike this:width = (context.region.width / bpy.context.preferences.view.ui_scale) * (122 / bpy.context.preferences.system.dpi)On my system
bpy.context.preferences.system.dpiis122. If someone with another system DPI value could test the line wrapping that would be great. Of course it is fickle in any case, since it doesn't handle a custom interface font. I just measured the pixels the characters have on my screen. Is there a way to measure the actual size of text as it will be rendered? Like theCanvas.measureText()API in JavaScript?It looks like this:

-
- nickberckley changed review status to Approved
- 3 d
There isn't multi-line texts yet, so any method is as good as others. I'll approve this as it is
-
Thank you! 😄
Add comment
Sign in to comment.
Ready for review