- AIGODLIKE_LJ changed review status to Awaiting Review
- 4 w
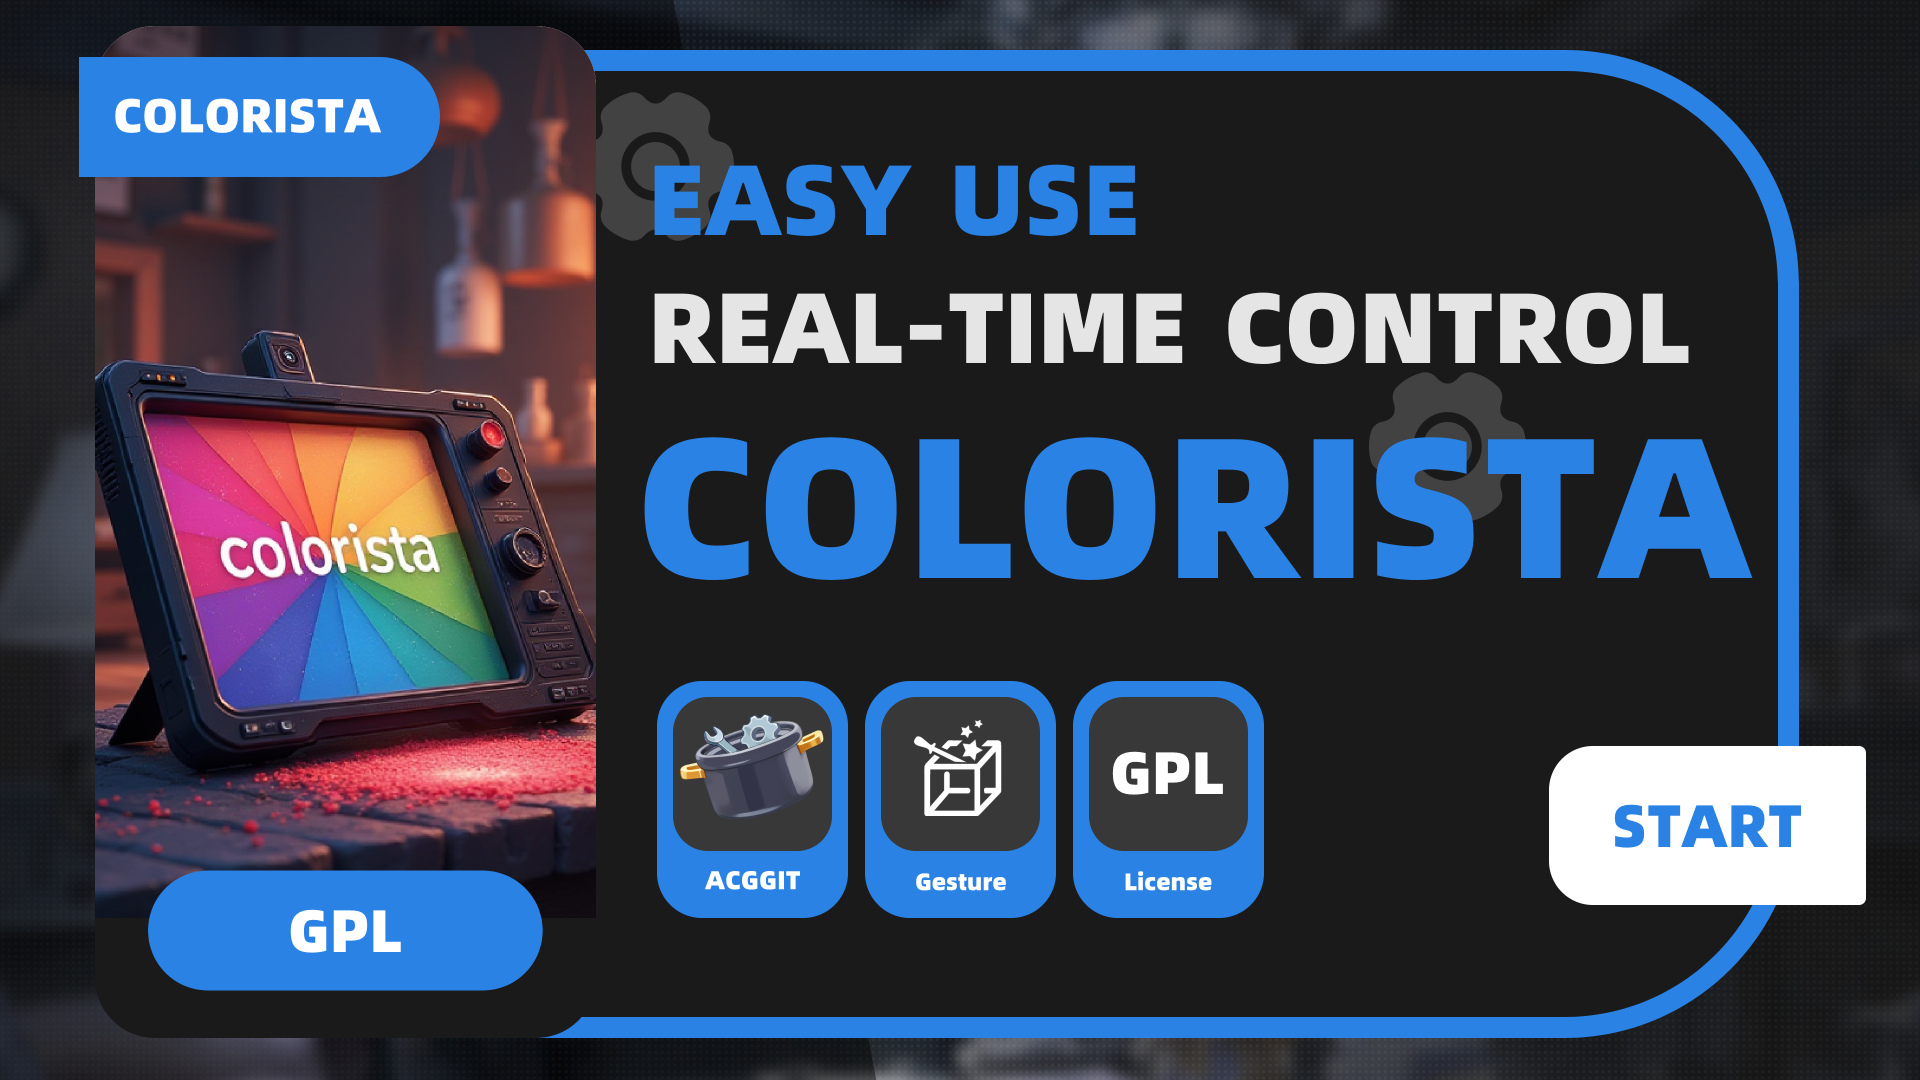
 Colorista
A convenient color grading add-on designed for colorists.

Featured image
Colorista
A convenient color grading add-on designed for colorists, allowing for one click construction of AGX color grading panels and real-time preview of effects directly in the viewport.
Function
· One click access to real-time color adjustment mode
· Directly available specialized color palette panel
· Synchronized color management
· Support historical records
· Support preset settings
· Support both Chinese and English
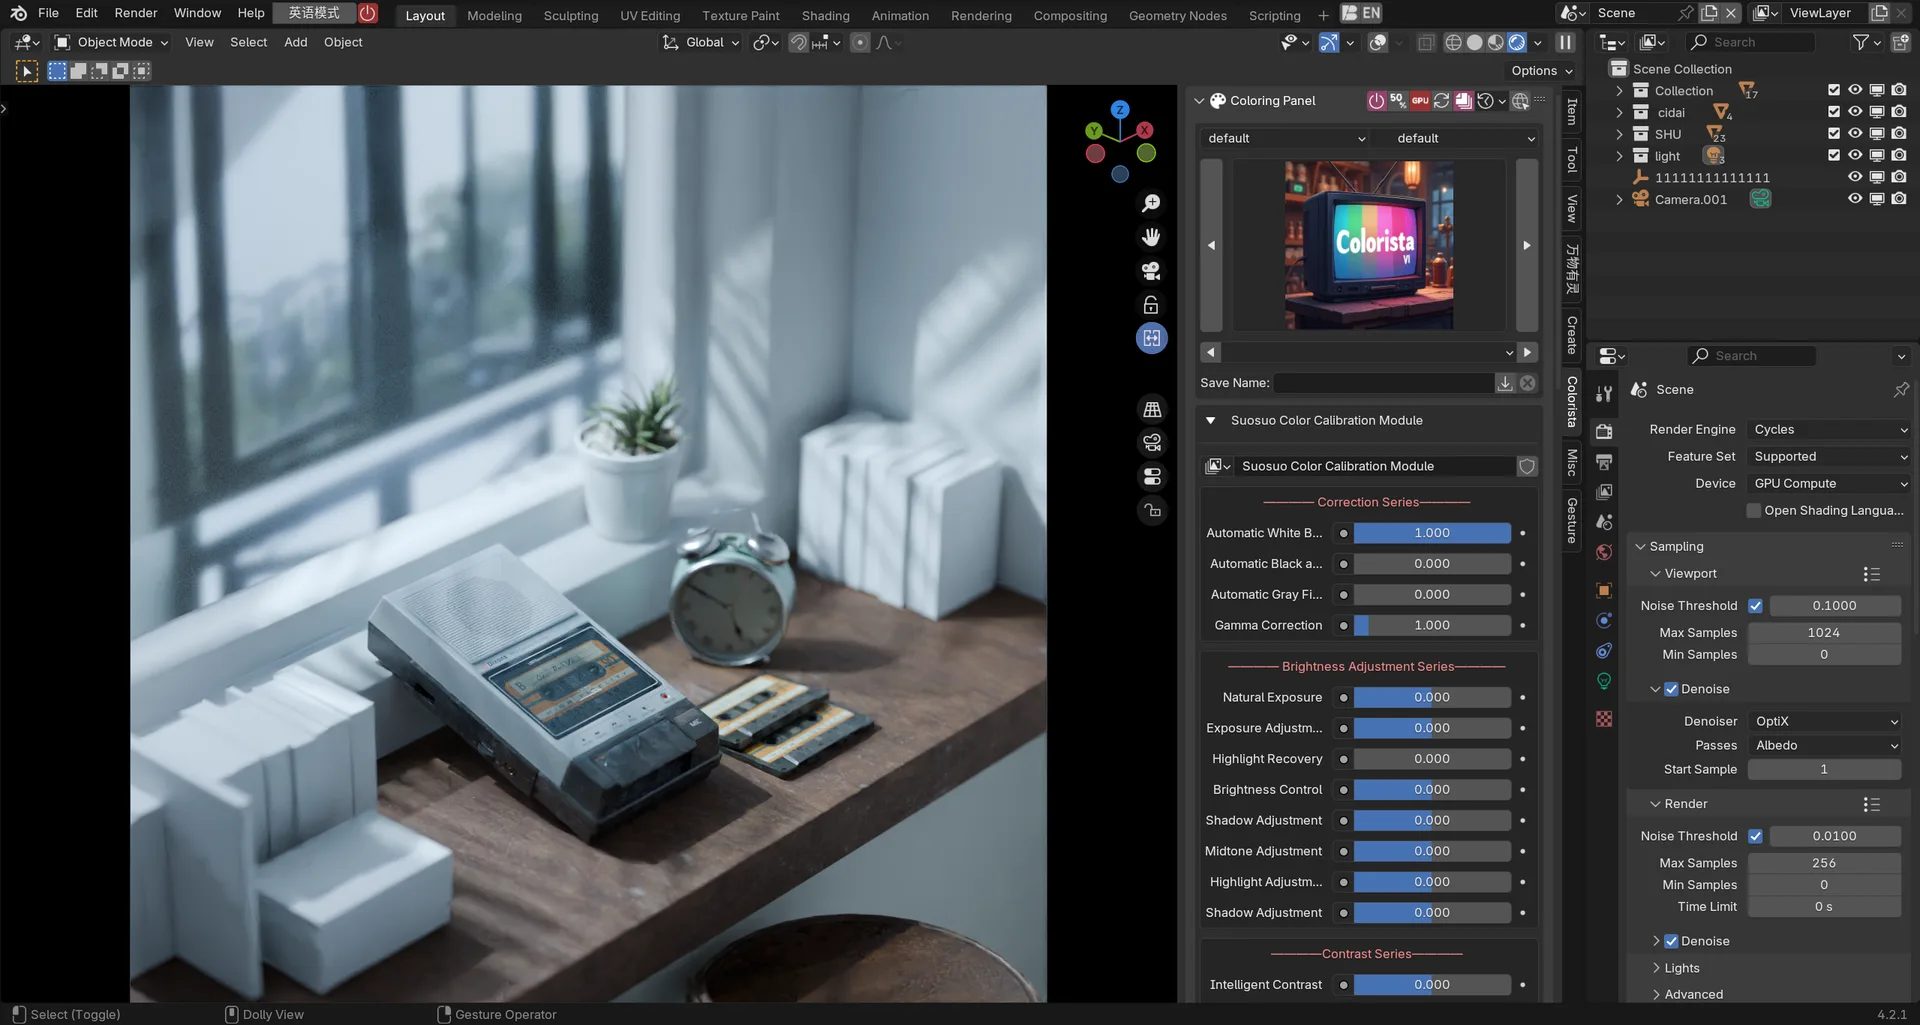
Use Composer Colorista VI
Correction Series
Automatic White Balance : Automatically adjusts color balance based on lighting conditions, making the whites in the image appear natural.
Automatic Black and White Field : This feature automatically adjusts the pure white and pure black areas in the image. It is recommended to set the parameters to maximum; the effect is best in Agx mode, while the standard mode may result in overexposure.
Automatic Gray Field : Automatically adjusts the gray areas, achieving excellent results in standard color space.
Gamma Correction : Applied for gamma correction.
Brightness Adjustment Series
Natural Exposure : Natural exposure adjustment is also used to regulate the overall exposure level, but it has a softer effect and is less intense, making it suitable for more delicate exposure adjustments.
Exposure Adjustment : Used to process areas that are overexposed or approaching overexposure. By employing highlight compression, it can recover slightly overexposed highlight areas and restore details in the bright regions.
Brightness Control : Controls the overall brightness of the highlight areas in the image. This parameter has a wide range but offers a gentle effect, making it suitable for adjusting the highlights as a whole.
Shadow Adjustment : Adjusts the brightness of the shadow areas in the image. This parameter has a wide range but offers a gentle effect, making it suitable for controlling the overall brightness of the shadows in the image.
Midtone Adjustment : By adjusting the brightness of the midtones in the image, you can further optimize the overall balance. This adjustment helps maintain the image’s sense of depth and layering.
Highlight Adjustment : Specifically adjusts the brightness of the brightest areas in the image. Compared to the “Whites” adjustment, it has a narrower range but a stronger effect, making it suitable for fine-tuning the highlight regions.
Shadow Adjustment : Adjusts the brightness of the darkest areas in the image. This adjustment has a narrower range but a more pronounced effect compared to the “Blacks” adjustment, making it suitable for fine-tuning the brightness of the shadow regions.
Contrast Series
Intelligent Contrast : Intelligent contrast offers a more nuanced adjustment approach, selectively affecting the contrast of different areas in the image. It is recommended to set this parameter to the maximum value initially and then make adjustments based on the actual effect to achieve the best results.
Contrast : Contrast is a key parameter that affects the brightness differences in an image, reflecting the degree of difference between the brightest and darkest parts. By appropriately adjusting the contrast, you can enhance the visual depth and sense of layering in the image.
Visual Clarity Series
Clarity : This parameter is specifically designed to enhance the local contrast of an image, often used to boost mid-frequency details. By doing so, it makes the image appear more three-dimensional and sharper.
Texture : This parameter is primarily used to adjust mid-level details. It does not affect the overall contrast or edge details but focuses on enhancing or softening subtle details in the image, such as skin texture or the surface texture of objects.
Natural Sharpening : Natural sharpening is a technique that enhances the sharpness of an image without introducing noise and with minimal halo effects. Compared to clarity adjustments, natural sharpening allows for more precise control over the image’s sharpness without significantly affecting the contrast of larger areas. This method ensures that fine details are enhanced while maintaining a natural appearance, making it particularly useful for preserving the integrity of textures and details without compromising overall image quality.
Sharpening : Similar to traditional sharpening tools, excessively high sharpening values can introduce image noise and may cause the overall image to darken. It is advisable to use this adjustment in conjunction with a noise reduction parameter. A common recommendation is to set the noise reduction value to about half of the sharpening value to effectively mitigate the noise introduced by sharpening while preserving detail. This balanced approach helps maintain image quality and ensures that enhancements do not compromise the overall appearance.
Noise Reduction : Noise reduction is used to minimize the noise in an image caused by contrast between light and dark areas. However, it is important to note that this adjustment cannot eliminate noise resulting from under-sampling. If the noise reduction value is set too high, it may lead to a loss of fine details in the image. Therefore, it is recommended to use it in conjunction with sharpening tools, where the noise reduction value is ideally set to about half of the sharpening value. This balanced approach helps maintain detail while effectively reducing noise, resulting in a cleaner and more visually appealing image.
Color Tone Adjustment
Scene Hue Shift (RGB) : Regular Adjustment of Scene Hue.
Scene Hue Shift (Lab) : Adjusting Scene Hue in LAB Mode.
Color Temperature (Cool/Warm) : Adjusting the color temperature can shift the image towards cooler or warmer tones. Lowering the color temperature value will make the image cooler (with a blue tint), while increasing the color temperature will make the image warmer (with a yellow or orange tint).
Dyeing Target Color : Users can choose the target color they want the image to lean towards. Once the color is selected, the overall color tendency of the image can be adjusted by modifying the dyeing intensity.
Target Color Dyeing Intensity : Control the dyeing intensity of the currently selected target color. The higher the dyeing intensity value, the stronger the image’s color tendency towards the target color; conversely, a lower value will result in a weaker tendency.
Saturation Series
Intelligent Saturation : Intelligent saturation is a more refined tool that selectively adjusts the saturation of certain areas based on the image’s contrast and existing saturation distribution, making the adjustment effect more precise. It is recommended to initially set it to the highest value and then gradually it while observing the image to achieve the best results.
Natural Saturation : This parameter primarily focuses on areas of low saturation in the image, aiming to maintain a natural look and avoid making colors appear overly exaggerated or distorted.
Contrast Saturation : Focuses on areas of high saturation in the image; excessively high values may lead to color distortion or make the image appear unnatural. Moderate adjustments can enhance or reduce the contrast effect in these areas.
Saturation : Saturation directly affects the intensity or vividness of colors in an image. Increasing saturation makes colors more vibrant, while decreasing saturation results in softer colors.
Desaturation
Desaturation (Saturation/Contrast) : Observe the saturation distribution on the left and the brightness distribution on the right.
Suosuo Effects Series
Glow Intensity : Control the glow effect of the scene.
Starburst Intensity : Create a star-like glow effect in the scene.
Lens Distortion : Distort the lens; sliding to the right shows color, while sliding to the left shows no color.
Blend Colors/Film Grain : The film grain is very subtle.
Mosaic Effect/Black and White Striped Pattern : It will transition to the feel of early black and white comics as you move to the right.
RGB Curves
Color Balance
Hue Correct
Create your own project
Open the Composing panel and connect your nodes/node groups.
On the label of the node/node group you want to display on the panel, fill in the serial number, such as 01, 02, 03, 04, etc
Save the file and place it in the Colorista \ resource \ EN \ your folder
If you need a thumbnail, you can consider A The combination of Blend and A.png
limitation
· The principle of presets is to save files. If you make changes, the presets will not be synchronized. Please save again.
· Incorrect ACES settings are not recommended for use
Producer
朔朔的搅拌机日常 provided the principle node production for the color palette, which was the key to the birth of this tool.
KarryCharon has completed the code development of the tool.
BlenderCN-LJis responsible for debugging, documenting, and promoting this tool.
What's New
1.1.1 October 5th, 2024
Major updates
Function
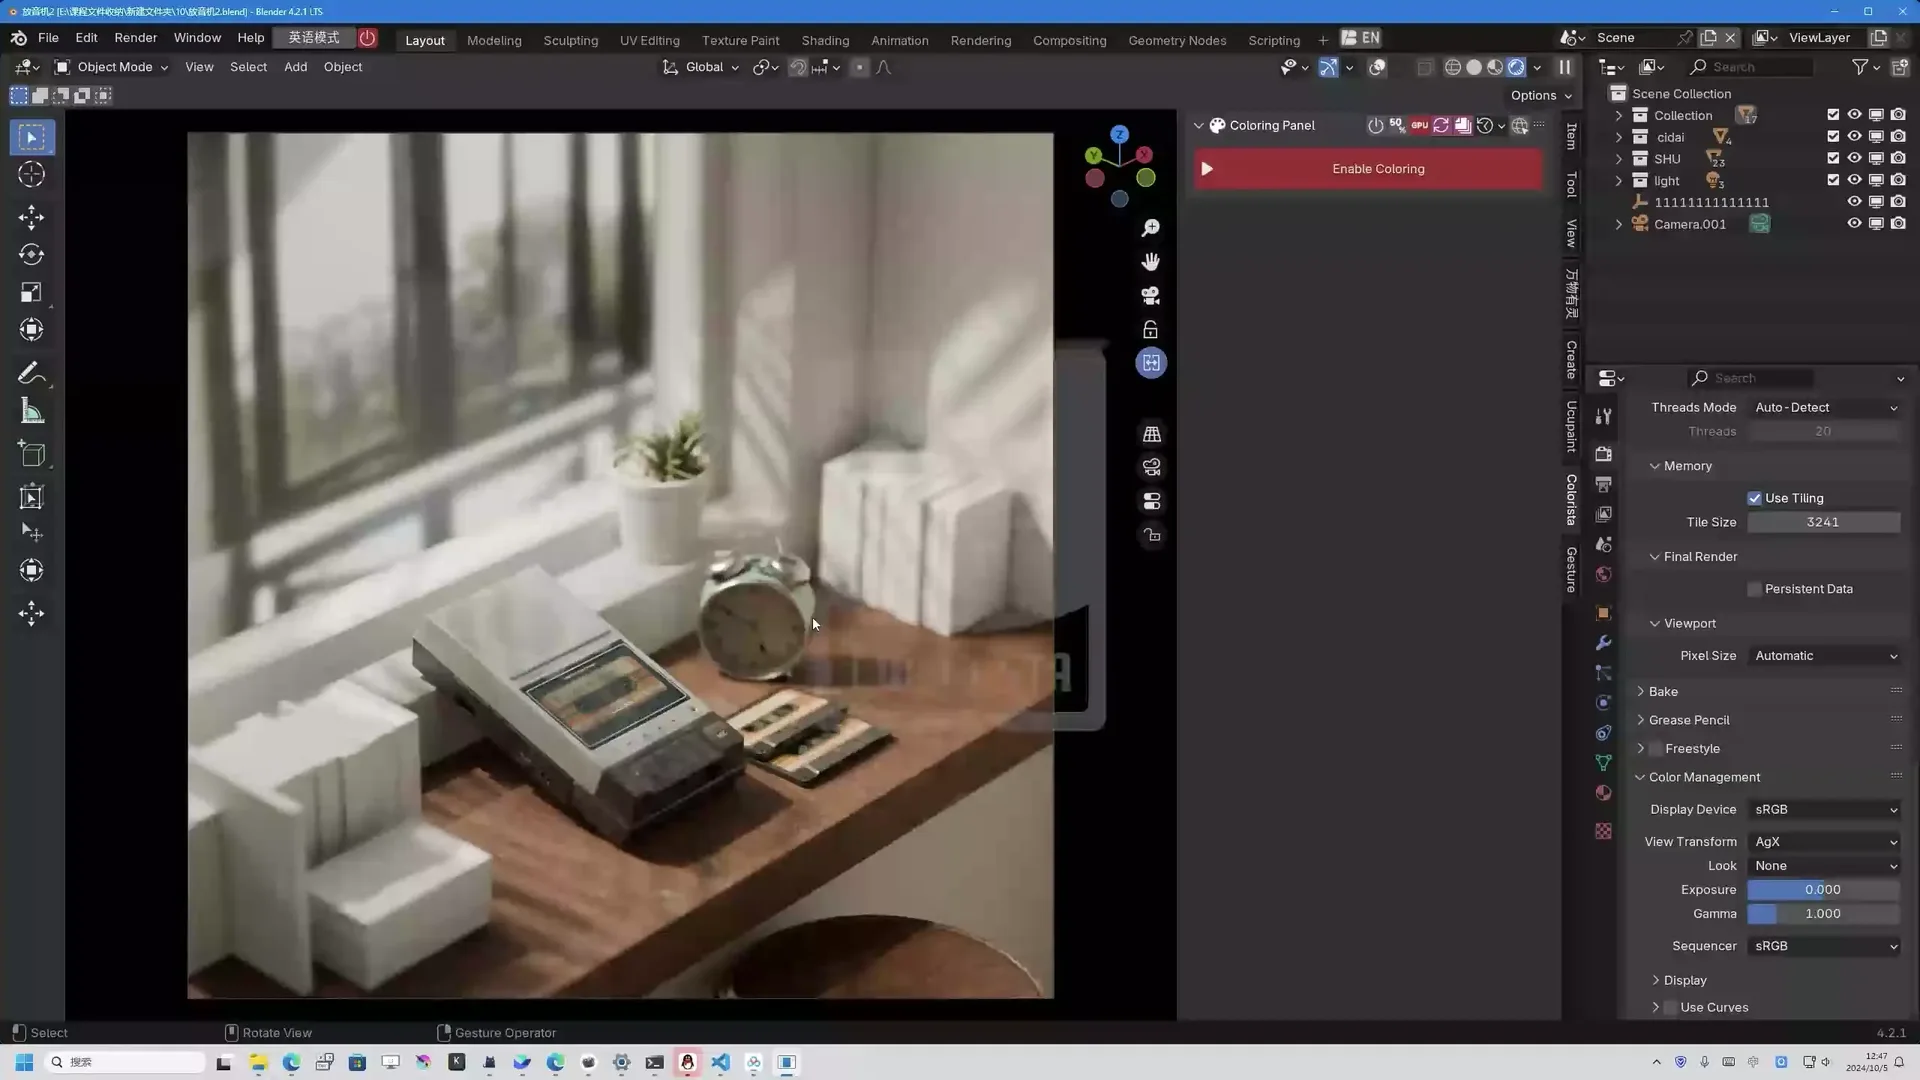
Optimize interface layout: The main switch, switching accuracy, GPU/CPU mode switching, color management synchronization, history, and help documents are placed at the top of the plugin. The synthesizer provides real-time preview and is placed in the left Gizemo area New file management: You can add your own synthesizer presets
New synchronized color management: When loading preset files, the color management settings of the preset files will also be updated. Default closed.
New History: When a file or preset is loaded, the history will be saved. You can restore it at any time.
Composer Colorista VI
Correction Series
Automatic White Balance : Automatically adjusts color balance based on lighting conditions, making the whites in the image appear natural.
Automatic Black and White Field : This feature automatically adjusts the pure white and pure black areas in the image. It is recommended to set the parameters to maximum; the effect is best in Agx mode, while the standard mode may result in overexposure.
Automatic Gray Field : Automatically adjusts the gray areas, achieving excellent results in standard color space.
Gamma Correction : Applied for gamma correction.
Brightness Adjustment Series
Natural Exposure : Natural exposure adjustment is also used to regulate the overall exposure level, but it has a softer effect and is less intense, making it suitable for more delicate exposure adjustments.
Exposure Adjustment : Used to process areas that are overexposed or approaching overexposure. By employing highlight compression, it can recover slightly overexposed highlight areas and restore details in the bright regions.
Brightness Control : Controls the overall brightness of the highlight areas in the image. This parameter has a wide range but offers a gentle effect, making it suitable for adjusting the highlights as a whole.
Shadow Adjustment : Adjusts the brightness of the shadow areas in the image. This parameter has a wide range but offers a gentle effect, making it suitable for controlling the overall brightness of the shadows in the image.
Midtone Adjustment : By adjusting the brightness of the midtones in the image, you can further optimize the overall balance. This adjustment helps maintain the image’s sense of depth and layering.
Highlight Adjustment : Specifically adjusts the brightness of the brightest areas in the image. Compared to the “Whites” adjustment, it has a narrower range but a stronger effect, making it suitable for fine-tuning the highlight regions.
Shadow Adjustment : Adjusts the brightness of the darkest areas in the image. This adjustment has a narrower range but a more pronounced effect compared to the “Blacks” adjustment, making it suitable for fine-tuning the brightness of the shadow regions.
Contrast Series
Intelligent Contrast : Intelligent contrast offers a more nuanced adjustment approach, selectively affecting the contrast of different areas in the image. It is recommended to set this parameter to the maximum value initially and then make adjustments based on the actual effect to achieve the best results.
Contrast : Contrast is a key parameter that affects the brightness differences in an image, reflecting the degree of difference between the brightest and darkest parts. By appropriately adjusting the contrast, you can enhance the visual depth and sense of layering in the image.
Visual Clarity Series
Clarity : This parameter is specifically designed to enhance the local contrast of an image, often used to boost mid-frequency details. By doing so, it makes the image appear more three-dimensional and sharper.
Texture : This parameter is primarily used to adjust mid-level details. It does not affect the overall contrast or edge details but focuses on enhancing or softening subtle details in the image, such as skin texture or the surface texture of objects.
Natural Sharpening : Natural sharpening is a technique that enhances the sharpness of an image without introducing noise and with minimal halo effects. Compared to clarity adjustments, natural sharpening allows for more precise control over the image’s sharpness without significantly affecting the contrast of larger areas. This method ensures that fine details are enhanced while maintaining a natural appearance, making it particularly useful for preserving the integrity of textures and details without compromising overall image quality.
Sharpening : Similar to traditional sharpening tools, excessively high sharpening values can introduce image noise and may cause the overall image to darken. It is advisable to use this adjustment in conjunction with a noise reduction parameter. A common recommendation is to set the noise reduction value to about half of the sharpening value to effectively mitigate the noise introduced by sharpening while preserving detail. This balanced approach helps maintain image quality and ensures that enhancements do not compromise the overall appearance.
Noise Reduction : Noise reduction is used to minimize the noise in an image caused by contrast between light and dark areas. However, it is important to note that this adjustment cannot eliminate noise resulting from under-sampling. If the noise reduction value is set too high, it may lead to a loss of fine details in the image. Therefore, it is recommended to use it in conjunction with sharpening tools, where the noise reduction value is ideally set to about half of the sharpening value. This balanced approach helps maintain detail while effectively reducing noise, resulting in a cleaner and more visually appealing image.
Color Tone Adjustment
Scene Hue Shift (RGB) : Regular Adjustment of Scene Hue.
Scene Hue Shift (Lab) : Adjusting Scene Hue in LAB Mode.
Color Temperature (Cool/Warm) : Adjusting the color temperature can shift the image towards cooler or warmer tones. Lowering the color temperature value will make the image cooler (with a blue tint), while increasing the color temperature will make the image warmer (with a yellow or orange tint).
Dyeing Target Color : Users can choose the target color they want the image to lean towards. Once the color is selected, the overall color tendency of the image can be adjusted by modifying the dyeing intensity.
Target Color Dyeing Intensity : Control the dyeing intensity of the currently selected target color. The higher the dyeing intensity value, the stronger the image’s color tendency towards the target color; conversely, a lower value will result in a weaker tendency.
Saturation Series
Intelligent Saturation : Intelligent saturation is a more refined tool that selectively adjusts the saturation of certain areas based on the image’s contrast and existing saturation distribution, making the adjustment effect more precise. It is recommended to initially set it to the highest value and then gradually it while observing the image to achieve the best results.
Natural Saturation : This parameter primarily focuses on areas of low saturation in the image, aiming to maintain a natural look and avoid making colors appear overly exaggerated or distorted.
Contrast Saturation : Focuses on areas of high saturation in the image; excessively high values may lead to color distortion or make the image appear unnatural. Moderate adjustments can enhance or reduce the contrast effect in these areas.
Saturation : Saturation directly affects the intensity or vividness of colors in an image. Increasing saturation makes colors more vibrant, while decreasing saturation results in softer colors.
Desaturation
Desaturation (Saturation/Contrast) : Observe the saturation distribution on the left and the brightness distribution on the right.
Suosuo Effects Series
Glow Intensity : Control the glow effect of the scene.
Starburst Intensity : Create a star-like glow effect in the scene.
** Lens Distortion** : Distort the lens; sliding to the right shows color, while sliding to the left shows no color.
Blend Colors/Film Grain : The film grain is very subtle.
Mosaic Effect/Black and White Striped Pattern : It will transition to the feel of early black and white comics as you move to the right.
RGB Curves
Color Balance
Hue Correct
Activity
-
-
I will continue to maintain this tool until Blender decides and releases the same feature
-
- nickberckley changed review status to Awaiting Changes
- 3 w
From code review:
policy_for_sys_modules: Use of
sysmodule that may violate policies.Warn about access to
syswhich may manipulate module loading for all extensions.output\Colorista\source\Colorista\__init__.py:31:19: for i in list(sys.modules): output\Colorista\source\Colorista\__init__.py:34:13: del sys.modules[i] output\Colorista\source\Colorista\__init__.py:35:9: del sys.modules[__package__]
Add-on works well in overall. Having worked on add-ons that deal with nodes myself my sincerest advise would be to not go down the path of exposing nodes in sidebar because SO MANY things can go wrong. Its just so much safer to ask users to play with node inputs. But that being said, if that's the path you want to take it's alright.
Two problems I had with this:
- It overwrites entire compositing node tree, instead of just adding nodes. It creates problems where users can destructively lose their setup, and also makes it incompatible for people who want to use custom nodes. For example I tested with scene where I added some Pixelate and Filter nodes to make pixel art, now I want to colorize my pixel art and enable the add-on, but it removes my nodes and its not pixelated anymore.
At the very least you should document this and say "this add-on overwrites compositor, so your work will be lost. Can't be used alongside custom node setups", but the best solution for users would be if instead of overwriting nodes you just added them after user-made nodes.
From my experience, way to do it is this: Have a function that searches for "Composite" node in tree. When you add "Luminance Correction Input" node (first one), instead of inputting Render Layer image output there, input whatever was inputted in the Composite node, add all new nodes in the XY place where Composite was, and just Composite node to the right, so that nodes don't sit on top of each other. Sounds complicated buts its very easy setup that can make add-on support MUCH more usecases.
- Second issue is that if I manually delete nodes in Compositor they're lost forever. That can lead to unhappy accidents. How I protect from this in my scripts is this: Have a function in panel that checks if every node/node group is in the node tree. If any of them isn't, it exposes "Regenerate Broken Node Tree" operator. Building up that operator isn't easy, but its worth it.
Neither of those issues will be blocking, only
sysmodule manipulation is blocking one for now, but those two can improve your add-on a lot if you decide to implement them. -
I will try to fix it, and I have recently received some new suggestions. (For example, improving the scalability of add ons) I will complete it together and submit it. I have an additional question. Currently, the Blender thumbnail is 128 * 128, and I hope to provide a higher resolution display. Therefore, I have built a DLL file using C++. Is this allowed to appear?
-
Sorry, I don't know what you mean by Blender thumbnail?
-
-
I'm not sure, unfortunately. We've never had this case before.
-
It is mainly used here to display higher resolution images, can use more threads, improve reading speed, and supports formats such as PNG, JPG, HDR, EXR, PSD, etc.
-
Let me postpone this feature for now, I'll go modify other content first
-
Hi, the development of version 1.1.1 has been completed. Please review.
Future plans
Make adaptive changes for the new features of version 4.3 in the future.
-
- AIGODLIKE_LJ changed review status to Awaiting Review
- 1 w
Updated
-
- nickberckley changed review status to Approved
- 1 w
Approved
-
updated description
Add comment
Sign in to comment.
Ready for review