 Symple (symmetry groups)
Symple (symmetry groups)
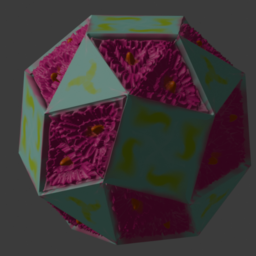
Adds objects with discrete spherical symmetry (dihedral, cyclic, tetrahedral, octahedral, icosahedral).
Usage
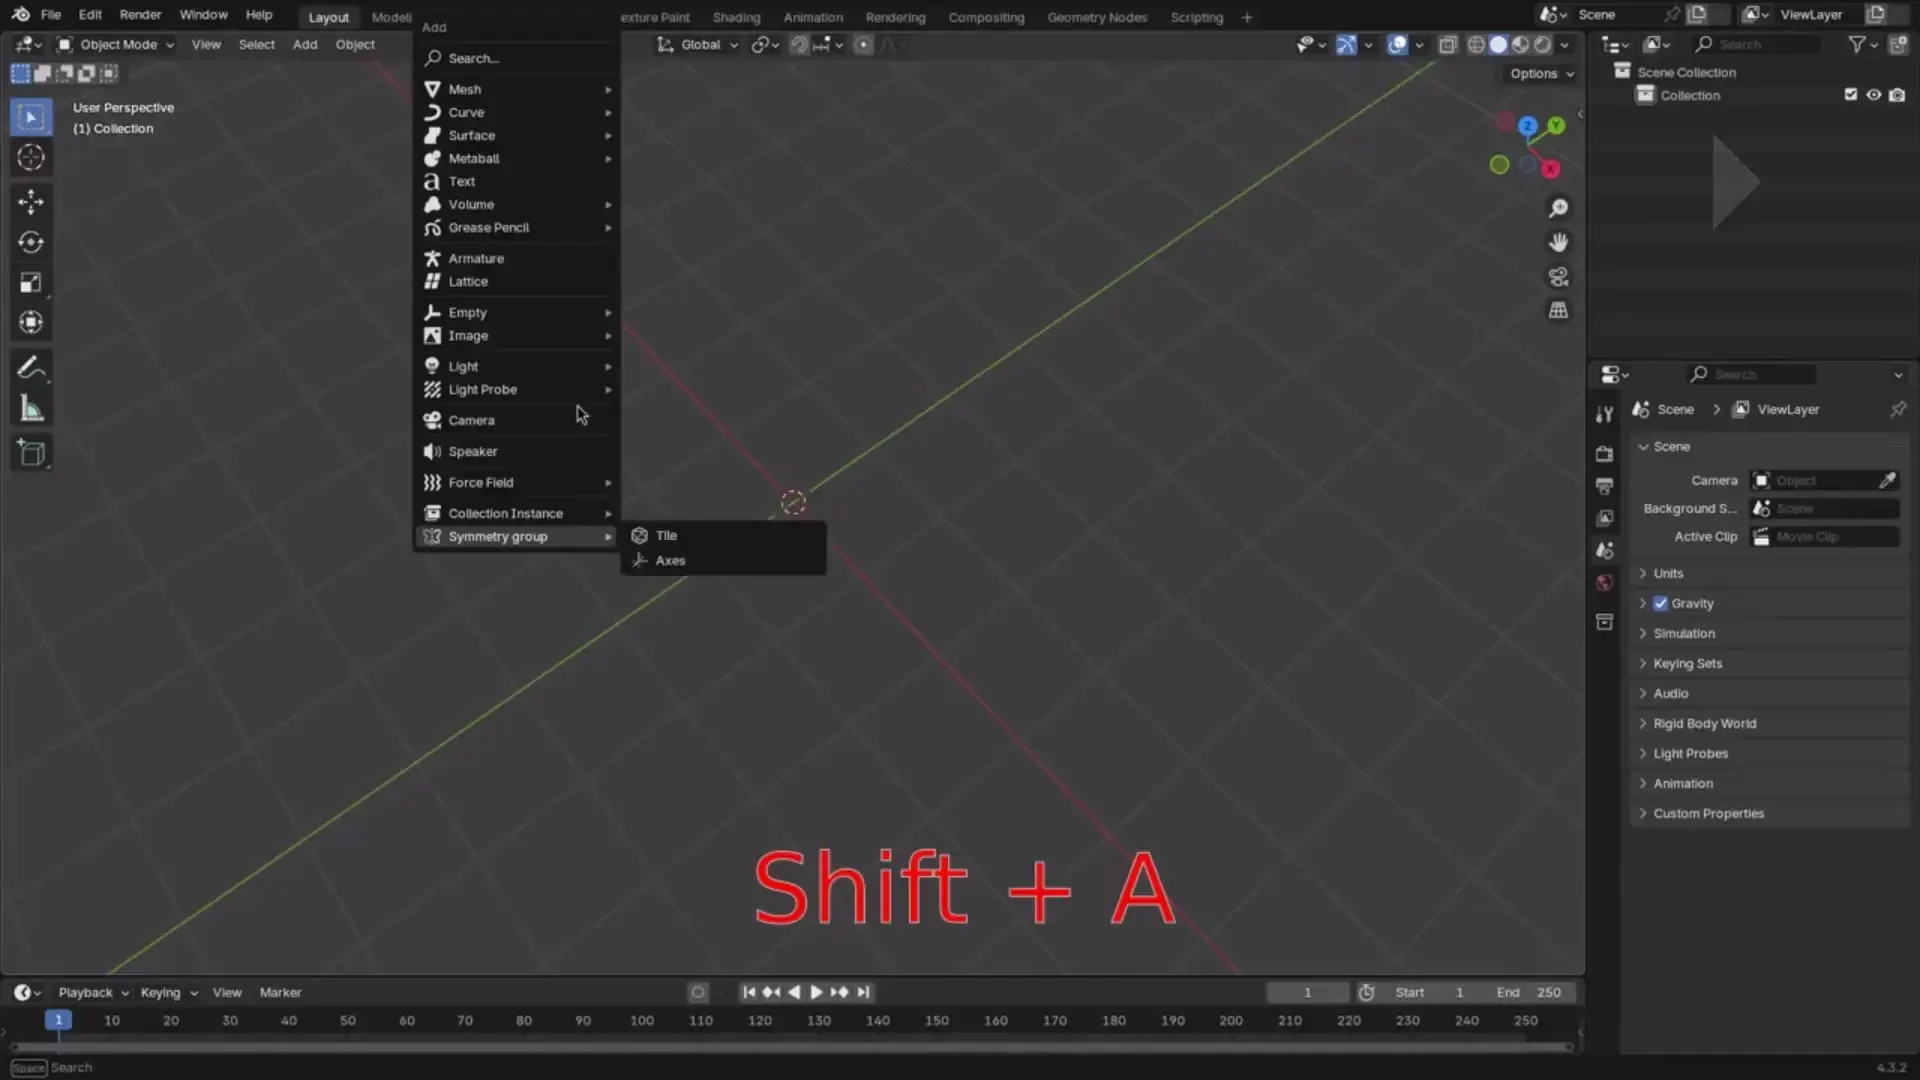
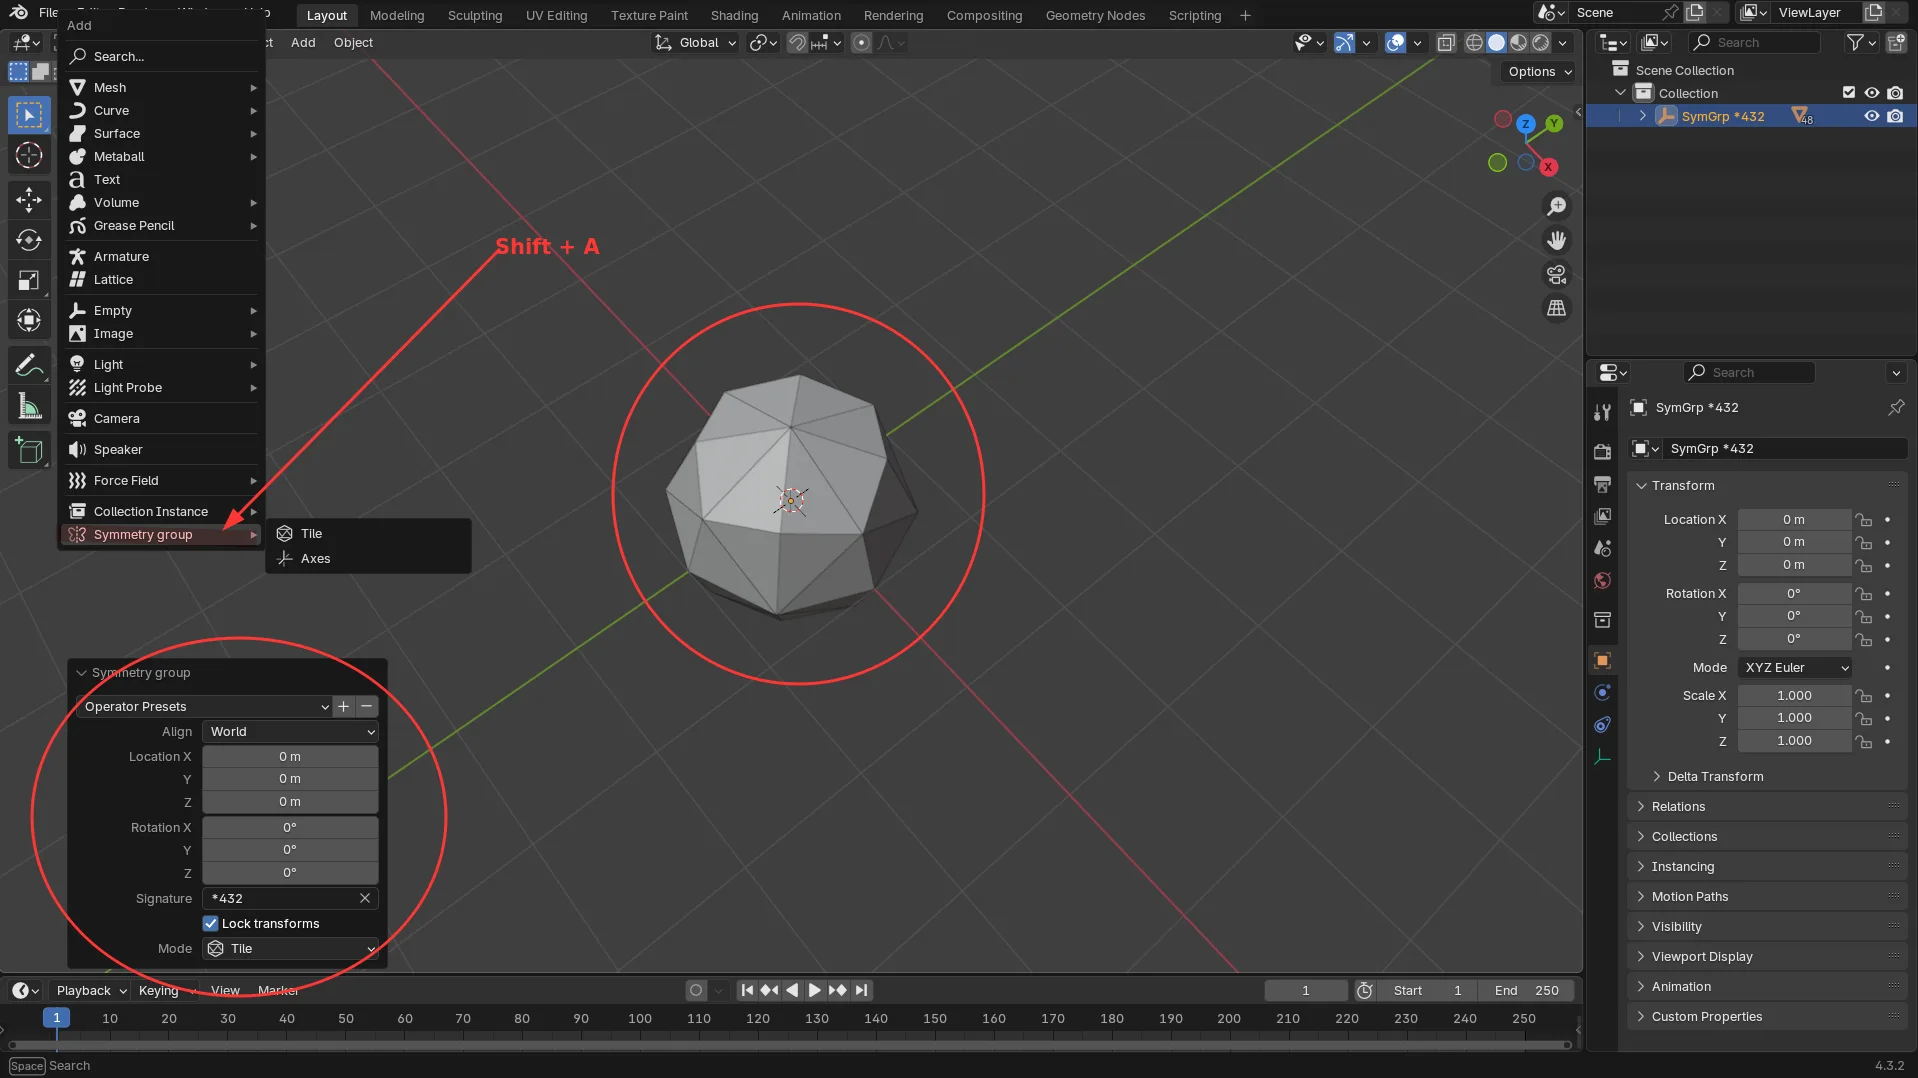
In object mode, press Shift+A (add object). Then look for Symmetry
group. You can choose whether to add a mesh (fundamental tile) or a
group of axes. A group of objects of the specified type will appear
parented to an empty object with the same name as the group
signature. All objects share the same data, only differing in
location, rotation and scale.
Option lock transforms fixes the location, rotation and scale of the objects. This is to avoid breaking the symmetry. You can still move the objects by moving the parent empty.
Option signature refers to an Orbifold signature that corresponds to a spherical group of symmetries. If you do not know about it, you can choose an option from the presets. (Note: different permutations of the numbers in the signature will produce slightly different fundamental domains, even if the group is the same).
An alternative way to use it is: right-click on an object, and then Symmetry group from object. In this case, the object's data is used instead of a tile. This way you can use it with curves, bones, and so on.
Tips and shortcomings
It's nice to use it together with the Extra mesh objects extension, which includes regular solids. You can then remove, subdivide and pinch unneeded faces.
The mesh will break if you are not careful. If you leave the cursor at the center of the group, using the option Pivot point > 3D cursor helps. In general, try with different pivot points. Alternatively, search how this problem can be solved using key shapes. You can also add a mask to the mesh border if you want to do sculpting.
It would be nice if this was a modifier, but unfortunately this is not possible using python scripts. A workaround is to add multiple Mirror / Array modifiers on an object and select some of the axes of a symmetry group as objects of symmetry. This makes it easier not to break the mesh, and to work better with other modifiers.
Ctrl-Lon object mode lets you link data / copy modifiers.Right click on the group empty parent lets you select / delete the full hierarchy, and not only the parent. Similarly,
Shift+Clickon the eye lets you hide the whole hierarchy.Select all the meshes in the hierarchy and press
Ctrl-Jto join the meshes, if you want to have a unified mesh. Note that further edits will break the symmetry. You can merge relatively nearby vertices like this: Edit mode >M> by distance.
What's New
0.1.2 March 26th, 2025
Added Extra rotation to the Add symmetry group operators and updated presets.